
Picture this: You’re in the middle of a woodworking project, ready to make those perfect angled cuts, but then you realize your miter saw blade needs replacing. It’s a common hurdle, but don’t worry! Many woodworkers face this. This guide will walk you through, step by step, the process of how to install a miter saw blade. You’ll learn the correct methods, important safety measures, and even some helpful tips to keep your saw in great shape. This will help you get those cuts done and give you confidence, resulting in a higher Time on Page and reducing that dreaded Bounce Rate.
Essential Safety Precautions Before You Start
Before you even think about touching your miter saw, safety needs to be your top priority. Accidents can happen quickly with power tools, so it’s vital to create a safe work environment. This means taking precautions before you even think about reaching for a wrench. Never skip these steps; they protect you from serious injuries. Ignoring them might result in losing a finger or worse.
Power Disconnection: The First and Foremost Rule
The very first thing you MUST do is unplug your miter saw from the power source. This seems obvious, but it’s the most critical safety step. Accidental starts are the most common cause of saw-related injuries. Even if you think the switch is off, unplugging the saw removes all risk of electrical hazards. Also, make sure the power cord is clear of your workspace. A dangling cord is a tripping hazard, adding another layer of risk.
Many experienced woodworkers have made mistakes, but thankfully, most of them learned a lesson from their experience. Always err on the side of caution. Consider the unplugged state a non-negotiable step before any blade work.
- Unplug the Saw: This removes the immediate risk of electrical shock or accidental startup.
- Verify Disconnection: Double-check the plug and ensure it is out of the outlet.
- Power Cord Safety: Keep the cord away from the work area to prevent tripping and damage.
Personal Protective Equipment (PPE): Your Shield
Wearing appropriate personal protective equipment (PPE) is non-negotiable. This includes eye protection, ear protection, and, often, a dust mask. Flying debris and loud noises are common hazards when changing a blade. Good PPE protects you from these dangers. Choosing the right PPE can be the difference between a minor scrape and a trip to the hospital. Always inspect your PPE before use. Damaged or ill-fitting gear won’t protect you properly.
Hearing protection is also important. Prolonged exposure to loud noises from the saw can cause permanent damage. A dust mask or respirator protects your lungs from sawdust. Consider a face shield if you are concerned about dust and debris.
- Eye Protection: Wear safety glasses or a face shield to prevent eye injuries from flying debris.
- Hearing Protection: Use earplugs or earmuffs to reduce the noise level and prevent hearing damage.
- Respiratory Protection: A dust mask or respirator will protect your lungs from inhaling sawdust.
Workspace Preparation: A Safe Zone
Your workspace should be clear and well-lit. Remove any clutter that could get in the way or cause you to lose your balance. Good lighting is essential so you can clearly see what you’re doing. Make sure the area is stable and the saw is resting on a sturdy surface. A cluttered space increases the risk of mistakes and accidents. A well-organized workspace also helps you stay focused on the task at hand.
Before beginning, ensure adequate space around the saw to allow for movement. Good ventilation helps remove sawdust and reduce the risk of breathing problems. Place the saw on a flat, stable surface that can support its weight and the weight of any material you’re cutting. Remember that a clean, organized workspace is a safe workspace.
- Clear the Area: Remove any obstructions and ensure a clear working space.
- Ensure Good Lighting: Proper lighting allows you to see clearly and prevent mistakes.
- Stable Surface: Place the saw on a flat, stable surface to prevent wobbling.
Gathering Your Tools: What You Will Need
Before you begin the blade-changing process, make sure you have everything you need within easy reach. The tools required are usually simple, but having them organized saves you time and reduces frustration. Not having the right tool can turn a quick job into a slow and risky one. Knowing your tools is just as important as knowing how to use them. Many miter saws include the required tools. If you are unsure, consult your saw’s manual.
Required Tools and Materials
The tools and materials required for changing a miter saw blade are generally straightforward. You’ll need the right tools to safely remove the old blade and install the new one. Always use tools designed for the job. Using the wrong tool can damage your saw or even cause injury. This section explores what to have available before you start.
Consult your miter saw’s user manual for specific tool requirements. It may include specific wrenches. Keep your tools in good condition. A dull or damaged wrench can make the process more difficult and potentially dangerous.
- Wrench or Allen Wrench: You’ll need the correct wrench or Allen wrench to loosen and tighten the blade-retaining bolt or nut. Many miter saws include these wrenches.
- New Blade: Have the new blade ready. Make sure it’s the correct type and size for your saw and the projects you plan to do.
- Safety Glasses: Eye protection is a must to shield your eyes from debris.
Understanding Your Miter Saw’s Manual
Your miter saw’s manual is your most important resource. It contains specific instructions for your model, including the correct tools and safety procedures. Manufacturers provide detailed information about your saw, including how to install a new blade. This guide will provide general guidelines, but your saw’s manual is more specific. The manual has diagrams, tool specifications, and safety precautions. Taking a few moments to review it can prevent many potential problems.
If you have lost your manual, you can often find a digital copy online by searching for your saw’s model number. Take the time to understand your saw. Your saw is unique, and its manual provides the key to its safe and effective operation.
- Locate the Manual: Find the manual that came with your miter saw.
- Review Instructions: Read the section on blade replacement carefully.
- Reference Diagrams: Use the diagrams to understand the parts and procedures.
Choosing the Right Blade
Selecting the right blade is just as important as knowing how to install it. Different blades are designed for different materials and types of cuts. Using the wrong blade can damage your saw, the material you’re cutting, and create safety hazards. Selecting the right blade ensures you achieve the desired results and remain safe. The right blade also makes the job easier and more efficient.
Consider the material you will be cutting. Blades are available for wood, metal, plastics, and other materials. The number of teeth on the blade affects the cut quality. A blade with more teeth will produce a smoother cut, but it may cut slower. Take a moment to understand the different blade types, and choose the right one for your project.
- Material Compatibility: Choose a blade that matches the material you’re cutting.
- Tooth Count: Consider the tooth count based on your cut’s quality and speed needs.
- Blade Size: Make sure the new blade matches your saw’s specifications.
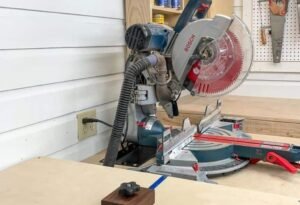
Removing the Old Blade Safely
Once you have taken the necessary safety precautions and gathered your tools, the next step is removing the old blade. This part requires care and attention to prevent injury. Following the correct procedure will ensure you remove the old blade and prepare for the new one. A slow and steady approach is key. Rushing this step could lead to injury or damage to your saw.
Locating the Blade-Retaining Bolt or Nut
The blade-retaining bolt or nut secures the blade to the saw. Its location varies slightly depending on the miter saw model. Knowing how to find and identify it is important before you start. Examine your saw and consult the manual to identify where the bolt or nut is located. Most saws have a safety device to prevent accidental start up.
The bolt or nut is typically found on the side of the blade housing. It may be covered by a safety guard. You may need a wrench or Allen wrench to loosen it. If you have any questions, consult your saw’s manual. Take the time to locate and identify the correct part.
- Identify the Bolt/Nut Location: Find the retaining bolt or nut on your saw.
- Consult Your Manual: Refer to your saw’s manual for specific instructions.
- Confirm Orientation: Understand which way to turn the bolt or nut to loosen it.
Loosening the Blade-Retaining Bolt or Nut
Once you’ve located the bolt or nut, the next step is to loosen it. This can often be the most difficult part, as it may be tightened securely. Use the correct wrench or Allen wrench to avoid damaging the bolt or nut. Work slowly and carefully, applying steady pressure. If the bolt is difficult to loosen, it may be necessary to apply penetrating oil.
Some miter saws have a blade-locking mechanism to prevent the blade from turning when you loosen the bolt. If your saw has this, engage it. If you don’t have this, you might need to wedge a piece of wood into the blade’s teeth to stop it from moving. Remember, don’t force anything. Apply steady pressure. If the bolt doesn’t budge, double-check your technique.
- Use the Correct Tool: Make sure you are using the correct wrench or Allen wrench.
- Apply Steady Pressure: Avoid jerking or excessive force.
- Utilize a Locking Mechanism: Use the blade-locking mechanism, if available.
Removing the Old Blade from the Saw
After the bolt or nut is loose, you can remove the old blade. Carefully slide the blade off the arbor, taking care not to touch the sharp teeth. Place the old blade in a safe place, where it won’t accidentally injure you or anyone else. Be careful when handling the old blade. The teeth are very sharp and can cause serious cuts. Put it away so it’s out of reach of children or pets.
Once the blade is removed, inspect the arbor for any debris or damage. Clean the arbor before installing the new blade. Debris can cause the new blade to run out of alignment. Removing the old blade safely helps prepare the saw for the new blade. Remember, safety should always be your priority.
- Slide Off Carefully: Remove the blade from the arbor, being careful to avoid the teeth.
- Dispose of Safely: Place the old blade somewhere safe.
- Inspect and Clean: Examine the arbor for damage.
Installing the New Blade: A Step-by-Step Guide
With the old blade removed, it is time to install the new one. This process requires precision to ensure the blade is correctly aligned and secure. Properly installing the new blade is essential for safe and accurate cutting. If the blade isn’t secured properly, it could come loose during operation, leading to injury. Following these steps carefully will help you get the new blade in place correctly.
Positioning the New Blade Correctly
Before securing the new blade, it’s essential to position it correctly on the arbor. Make sure the blade is facing the right direction. Most blades have an arrow indicating the direction of rotation. Facing the blade in the wrong direction can cause the saw to work inefficiently and even be dangerous. Proper blade positioning ensures it cuts correctly and safely.
Many miter saws also have markings on the blade guard that indicate the direction of the blade. The blade must sit flush against the arbor flange. Make sure the blade is centered and that all the parts are in the right place. Take the time to double-check the blade’s position. Proper positioning will ensure accurate cuts and safe operation.
- Check the Direction: Ensure the blade’s teeth are facing the right way.
- Align with the Arbor: Make sure the blade sits flat on the arbor flange.
- Confirm Alignment: Double-check the blade’s position before tightening.
Tightening the Blade-Retaining Bolt or Nut
Once the new blade is in place, you need to tighten the retaining bolt or nut. Use the correct wrench or Allen wrench and tighten the bolt or nut firmly. But don’t overtighten it. Overtightening can damage the blade or the saw’s components. Proper tightening secures the blade, ensuring it doesn’t move during operation. Also, make sure the bolt or nut is tight enough to hold the blade firmly in place.
Your saw’s manual will provide specific torque specifications. If you don’t have a torque wrench, tighten the bolt until it’s snug. But don’t go overboard. After tightening, give the blade a spin by hand to ensure it turns freely without any binding. A secure and properly tightened blade is important for safety and the quality of your cuts. Proper tightening will provide the best results.
- Use the Correct Tool: Use the right wrench or Allen wrench.
- Tighten Firmly: Secure the blade without overtightening.
- Check for Binding: Spin the blade by hand to make sure it turns smoothly.
Reassembling and Testing the Saw
After installing the new blade, reassemble any safety guards or components you removed. Once reassembled, it’s time to test the saw to make sure everything is working correctly. This is your final check before you begin cutting. This ensures the blade is properly installed. Testing will check that all the safety features are in place and working properly.
Plug the saw back into the power outlet. Turn it on and let it run for a few moments, away from any work. Listen for any unusual sounds or vibrations. Make a test cut on a piece of scrap wood. The saw should cut smoothly and accurately. If the saw doesn’t operate correctly, go back and check your work. Don’t use the saw if you are unsure about its safe operation. Make sure everything is in place before you start your project.
- Reassemble Components: Put all the safety guards back in place.
- Test the Saw: Turn on the saw and observe its operation.
- Make a Test Cut: Cut a piece of scrap wood.
Common Problems and Troubleshooting
Even if you follow all the steps correctly, there are issues that could come up. Understanding these problems and how to troubleshoot them will help you. Troubleshooting common problems will enable you to solve them efficiently. This could save you time and prevent unnecessary frustration. Knowing what to do when something goes wrong is just as important as knowing how to do it right the first time.
Blade Wobble or Vibration
If the blade wobbles or vibrates excessively when running, there are several possible causes. Loose components or a blade that isn’t properly installed are common reasons. Wobbling or vibration can affect cut quality and safety. Identifying the cause will help you fix the problem and avoid potential hazards. Correcting these issues is an important part of ensuring the saw operates safely and produces accurate cuts. If the vibration is severe, immediately turn off the saw.
Check the blade for damage or defects. Make sure the arbor nut or bolt is properly tightened. Examine the arbor flanges for debris. These flanges must be clean and free of rust. If the blade is still wobbling, the arbor may be bent, and you may need professional help. Contact a repair technician if you can’t determine the cause.
- Check Blade Installation: Make sure the blade is properly installed and centered.
- Inspect for Damage: Examine the blade for any damage or defects.
- Tighten Components: Ensure all components are securely tightened.
Binding or Difficulty Cutting
If the blade binds or struggles to cut through the material, several factors could be the cause. The blade might not be the right type for the material. Blade binding is a common problem, and it can be dangerous. Knowing how to fix this problem is key to avoiding accidents. Blade binding can cause the saw to kick back. Understanding the root cause of the binding helps you resolve it and continue working.
Ensure you are using the correct blade for the material. Also, make sure the blade is installed in the correct direction. Double-check the alignment of the saw and the material you’re cutting. The blade may be dull, and you will need to replace it. Never force the blade through the material. If the blade still binds, consult your saw’s manual for additional troubleshooting steps.
- Blade Selection: Make sure you’re using the correct blade for the material.
- Alignment Issues: Check the saw’s alignment to the material.
- Blade Condition: Ensure the blade is sharp and in good condition.
Uneven or Inaccurate Cuts
Uneven or inaccurate cuts can be caused by various issues. These issues can result in poor-quality cuts and wasted materials. Diagnosing the problem can help you get more accurate cuts. Being able to achieve precise cuts is crucial for any woodworking project. This will help you identify the source of the problem and make corrections. If cuts are off, a little detective work will set you up for success.
Check the blade’s alignment and make sure it is perpendicular to the base. Make sure the blade is not bent or damaged. Ensure the workpiece is securely held in place. It’s also possible the saw itself is out of alignment, which may require adjustment. If you cannot fix the issue, you may need to consult a professional for help.
- Blade Alignment: Ensure the blade is properly aligned.
- Blade Condition: Check that the blade is not bent or damaged.
- Workpiece Stability: Make sure the workpiece is secured in place.
Miter Saw Blade Maintenance and Care
To keep your miter saw running smoothly and safely, regular maintenance is essential. Proper care can extend the life of your saw and help you get the best results from your projects. Maintenance includes cleaning, blade care, and other steps. Taking care of your saw also enhances your safety. Regular maintenance prevents problems and keeps you working at your best.
Cleaning the Saw and Blade
Regular cleaning is a basic but important part of maintenance. Sawdust and debris build up over time. This can affect the saw’s performance and potentially cause damage. Clean the saw and blade regularly to keep them working properly. Removing sawdust will improve cutting and keep the saw operating. The right cleaning products and techniques will help you maintain the saw.
Use a brush or compressed air to remove sawdust from the saw’s components, including the blade guard and motor housing. Clean the blade with a specialized blade cleaner. Never use harsh chemicals or abrasives. Clean the saw’s rails, and lubricate them with a product. Doing this will improve the saw’s performance.
- Remove Sawdust: Brush away sawdust from all areas of the saw.
- Clean the Blade: Use a blade cleaner.
- Lubricate Rails: Use a lubricant.
Inspecting the Blade and Guard
Inspect the blade and blade guard before each use. A damaged blade or guard can create safety risks. A quick inspection can help prevent accidents and injuries. Regular inspection is an important step. This will provide early detection of potential problems. Catching problems early allows you to address them before they lead to serious issues.
Check the blade for any damage, such as cracks, chips, or bent teeth. Make sure the blade guard moves freely and is in good condition. Replace any damaged components immediately. Make sure the blade guard functions properly. Ensure all safety features are in good working condition before each use.
- Check for Damage: Inspect the blade for chips, cracks, or bent teeth.
- Guard Function: Ensure the blade guard moves freely and provides protection.
- Replace if Needed: Replace any damaged components.
Storing Your Miter Saw and Blades
Proper storage protects your miter saw and blades from damage and extends their lifespan. Store your saw and blades in a dry and safe place. Proper storage helps prevent damage. The right storage can keep your tools safe. Appropriate storage practices will help you keep the saw and its blades in great shape. Doing so is an easy step that protects your investment.
When storing the saw, make sure it is clean and dry. Store blades in their original packaging or in a protective case. This protects them from damage. Consider a storage cabinet or dedicated area in your workshop for your miter saw and its blades. Keeping everything organized helps maintain a safe and efficient workspace.
- Clean and Dry: Make sure the saw is clean and dry before storing.
- Blade Protection: Store blades in their original packaging.
- Organized Storage: Store the saw and blades in an organized location.
Frequently Asked Questions
Question: How often should I replace my miter saw blade?
Answer: The frequency of blade replacement depends on usage and the materials you’re cutting. If you cut frequently, consider replacing the blade every 6 months to a year, or as soon as it becomes dull or damaged. Consider inspecting the blade before each use.
Question: Can I use any blade on my miter saw?
Answer: No, not all blades are suitable for all miter saws. Always check the specifications in your saw’s manual. Ensure that the blade’s diameter, arbor size, and type match your saw’s requirements. This will help you get the best and safest results.
Question: What’s the best way to clean a miter saw blade?
Answer: Use a blade cleaner designed for the material of your blade (e.g., steel or carbide). Follow the cleaner’s instructions and avoid harsh chemicals or abrasives, as they can damage the blade’s teeth and surface. Regular cleaning of your blade is a must for good results.
Question: How do I know which direction my miter saw blade should face?
Answer: Most blades have arrows indicating the direction of rotation. Ensure that the teeth are pointing in the direction of the arrow. Many saws also have markings that indicate the direction. This is a crucial safety step.
Question: Can I sharpen a miter saw blade?
Answer: It depends on the blade type. Some carbide-tipped blades can be sharpened by a professional. However, it’s often more cost-effective and safer to replace the blade if it becomes dull or damaged. Professional sharpening is a possibility. But consider the cost before you decide.
Final Thoughts
Now you’re equipped with the knowledge and confidence to safely and effectively install a miter saw blade! You’ve learned about essential safety precautions, from disconnecting the power to wearing the correct personal protective equipment. You understand the tools you’ll need, how to identify and loosen the retaining bolt or nut, and then remove the old blade. The step-by-step guidance on properly positioning, securing, and testing the new blade ensures you’re ready for action. Beyond the steps, you’ve also explored troubleshooting common problems, so you can deal with any issues that arise. Finally, regular cleaning, inspections, and storage contribute to the longevity of your saw and blades.
Now, go ahead and tackle that project you’ve been putting off! Remember, safety always comes first. Double-check your work, and always refer to your miter saw’s manual for specific instructions. With these skills and knowledge, you’re one step closer to making those perfect cuts and creating projects you’ll be proud of. Happy woodworking!

I’m John F. Nicholas, the founder, lead writer, and drill enthusiast behind 101drill.com. With years of hands-on experience in power tools and DIY projects, I created this platform to share practical knowledge, expert tips, and real-world insights to help others master the art of drilling.