
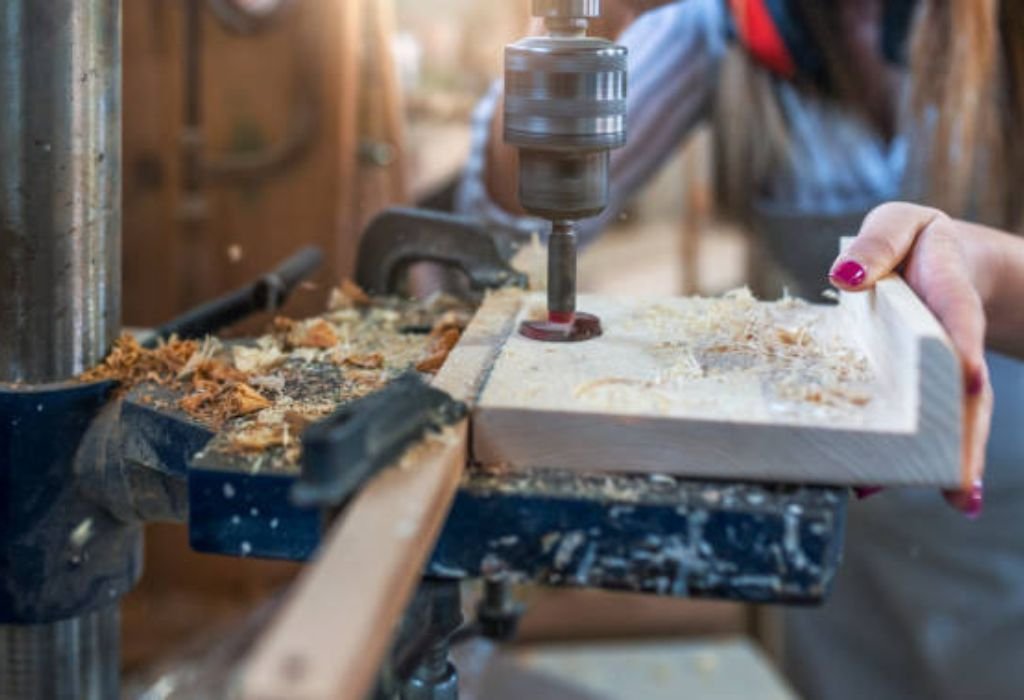
You mark a clean square outline on a wooden board, confident you can make it fit perfectly. But as you begin drilling, you realize the hole keeps turning round, no matter what bit you use. It’s frustrating — the screw fits, but the shape isn’t right, and your project loses its precision.
Most holes in wood are round because standard drill bits naturally spin that way. But many woodworking projects, mortise joints, square fittings, lock slots, or decorative inlays, need square holes. The challenge is that no ordinary drill can make sharp corners on its own.
Before modern power tools, carpenters used hand chisels and mortisers to carve perfect squares. The process required patience, a steady hand, and a clear understanding of grain direction.
Today, you can combine those traditional techniques with simple modern methods for better accuracy and speed.
In this complete guide, you’ll learn multiple ways to make square holes in wood — from hand chiseling to using mortising bits, drills, and routers. You’ll also discover how to avoid cracks, splinters, and uneven edges while achieving clean, professional-looking results.
Understanding Why Square Holes Are Important
Square holes play an essential role in woodworking design and structure. They’re used in mortise-and-tenon joints, one of the oldest and strongest connection methods in furniture making. The square sides hold the tenon firmly, preventing rotation and adding rigidity.
You’ll also find square holes in wooden locks, joinery frames, and decorative patterns. These designs demand precision since even slight unevenness affects balance or fitting.
In toolmaking, square holes allow hardware like bolts or fittings with flat edges to stay fixed, preventing them from spinning. It’s a practical engineering detail that adds strength and control.
Beyond structural value, square holes also add an aesthetic edge. They create symmetry in geometric furniture, panel cutouts, and inlay designs. Achieving such perfection, however, requires more than brute force — it demands finesse and patience.
Understanding why you need a square hole helps you select the right method and tool combination for your specific project.
Tools You Can Use to Make Square Holes
Making a square hole isn’t about one magic tool but about combining precision instruments. The most common approach involves using a drill to remove most material and a chisel to square off the corners.
Essential tools include:
- A hand drill or drill press for the initial circular cut.
- Sharp wood chisels (¼ inch, ½ inch, or 1 inch sizes).
- A mallet for controlled striking.
- A square mortising bit or hollow chisel mortiser if you have access to one.
- Clamps to stabilize the wood.
- Marking gauge, square, and pencil for layout precision.
If you work frequently with square holes, investing in a mortising machine saves hours. It’s designed to cut square or rectangular cavities efficiently.
Beginners, however, can achieve excellent results using only a chisel and drill by following careful technique — the method you’ll learn step by step in this guide.
Marking and Measuring the Square Hole
Accuracy starts with proper layout. Begin by marking the exact dimensions of the square hole using a ruler or marking gauge. Use a sharp pencil or marking knife to create thin, precise lines.
Check your layout twice using a try square to ensure each corner forms a perfect 90-degree angle. Even a small tilt at this stage leads to visible misalignment later.
If your hole is part of a mortise joint, measure the tenon first and transfer those exact dimensions to your wood. A tight fit is essential — not too loose, not too snug.
To prevent overcutting, draw light diagonal guide lines connecting the corners. These visual references help you stay within the boundaries while drilling or chiseling.
Finally, mark the center point for your first drill hole if you plan to remove material using a drill. Preparation here ensures your hole will be clean, centered, and symmetrical.
How to Drill and Chisel a Square Hole Manually
This traditional method combines drilling and chiseling for accuracy and clean edges. It’s perfect for those without advanced machinery but who still want professional-quality results.
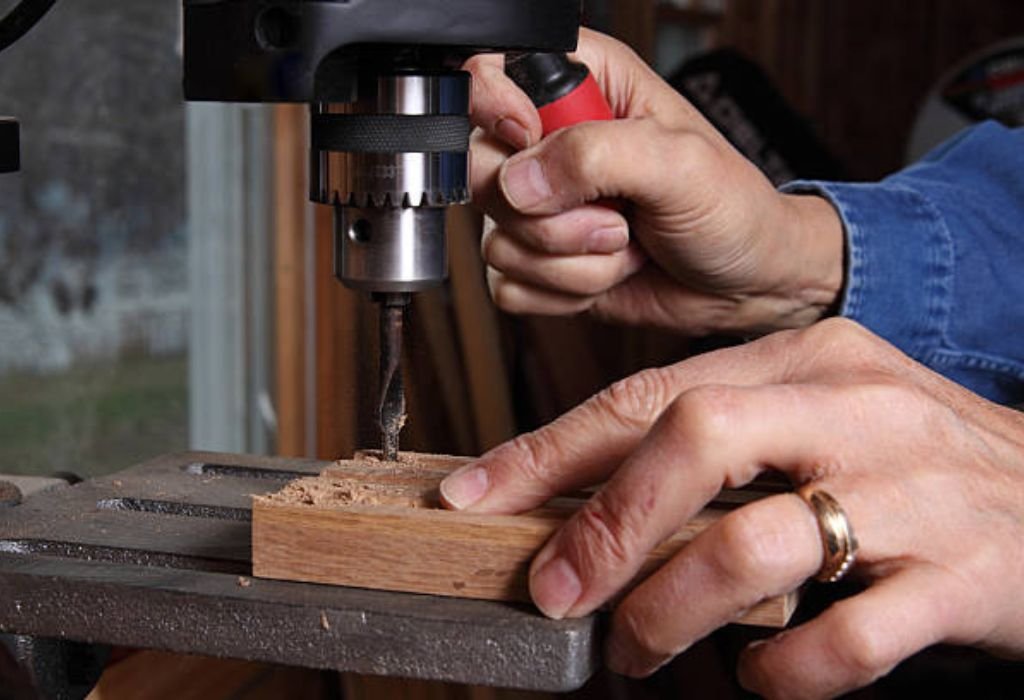
Start by drilling a series of small overlapping holes within your marked square using a twist bit or Forstner bit. Keep your bit just inside the lines — don’t go beyond them. These holes remove the bulk of the wood, making chiseling easier.
Once you’ve drilled out most of the interior, use a sharp chisel to refine the shape. Begin with the corners: position the chisel along one edge, with the beveled side facing inward. Tap gently with a mallet to slice cleanly along the line.
Work your way around the edges, removing small wood pieces at a time. Keep your hand steady and make shallow cuts to prevent tearing the grain.
Flip the wood if needed and finish from the other side to keep both faces smooth and aligned. The result is a crisp, square cavity ready for joinery or hardware installation.
This method might take longer than machine mortising, but it gives you unmatched control over the final shape.
Using a Square Mortising Bit with a Drill Press
If you want to achieve precise square holes faster, a square mortising bit (also called a hollow chisel mortiser) is your best tool. It’s a special attachment designed for drill presses or mortising machines.
The mortising bit combines two cutting tools — a square chisel and a drill bit inside it. As the inner bit removes material, the outer chisel squares the corners simultaneously.
Start by securing your wood firmly on the drill press table with clamps. Align the bit exactly over your marked area. Lower it slowly, letting the drill bit clear out material before the chisel cuts the edges.
Move systematically along your layout, overlapping each cut slightly to maintain consistent walls. Work from one end to the other instead of random spots to ensure uniform pressure and straight edges.
Always keep the mortising bit sharp and lubricated to prevent burning or jamming. This method produces perfect square holes quickly, making it ideal for professional woodworking or repetitive mortise cutting.
Cutting Square Holes with a Router and Template
A wood router offers another efficient way to create square holes, especially for larger or decorative openings. Using a router with a guide template gives you precise control over depth and shape.
First, prepare a square or rectangular template using MDF or plywood. The template acts as a cutting guide, so ensure it matches your desired dimensions exactly. Secure it firmly to your workpiece using clamps or double-sided tape.
Fit your router with a straight-cut bit. Adjust the cutting depth gradually — taking off a few millimeters at a time prevents burning and tear-out.
Start routing inside the boundary, keeping the base flat and moving steadily along the edges. Use the template to guide your movements and maintain clean, square corners.
For sharp internal corners, stop routing slightly before the corner and finish the last millimeter with a fine chisel. This creates flawless right angles that even power tools can’t fully achieve.
Routers make it possible to produce repeatable square holes in tabletops, cabinets, and panels with incredible consistency.
How to Use a Drill and Corner Chisel Combo
A corner chisel is a specialized tool made precisely for squaring off corners after drilling. It’s shaped like two chisels joined at 90 degrees and is ideal for cleaning up rounded edges left by drills.
Begin by drilling a round hole slightly smaller than your marked square. Once the material inside is cleared, position the corner chisel in one corner with its flat side facing outward.
Tap lightly with a mallet. The sharp edges of the chisel will slice perfectly into both sides of the corner simultaneously, leaving a sharp, square intersection. Repeat this step for each corner.
After finishing all four corners, use a regular chisel to clean up the flat sides and remove any small ridges between the corners.
This method saves time and ensures consistency. It’s especially effective for small mortises or hinge recesses where perfect corners matter most.
Tips for Getting Sharp and Clean Square Corners
Perfect corners separate amateur work from professional craftsmanship. To get crisp results, always use razor-sharp chisels and keep them honed with a sharpening stone or strop.
Avoid hitting too hard. Light, controlled taps with a mallet ensure precision without damaging surrounding fibers. Patience always beats brute force.
When chiseling, cut along the grain first before working across it. Cutting against the grain too early can cause tear-out or splintering near the edges.
If the wood is hard, moisten the surface slightly with a damp cloth before chiseling. This softens the fibers just enough to make clean cuts.
After completing your square hole, lightly sand the interior walls using folded sandpaper or a small file. Clean lines and smooth edges give the piece a polished, professional finish.
Avoiding Common Mistakes When Making Square Holes
One of the most common errors is drilling too close to the layout lines. Always keep your initial drill holes just inside the marked area. It’s easier to remove excess wood than fix an oversized hole.
Another mistake is using dull chisels. Dull edges crush fibers instead of slicing them, leaving ragged corners that are difficult to clean.
Inconsistent drilling depth is another issue. Uneven bottoms make mortise joints weak and unstable. Always check depth using a stop or tape marker.
Pressing too hard with a chisel can split thin wood. Work gradually, taking off thin layers until you reach your lines perfectly.
Finally, rushing the process is the biggest mistake. Square holes demand accuracy, and every shortcut shows in the final fit. Taking your time guarantees better craftsmanship.
Advanced Technique: Using a Jigsaw for Square Cutouts
If your square hole extends to the wood’s edge or forms part of a panel cutout, a jigsaw can simplify the job. It’s perfect for large or irregular square holes that can’t be reached with a chisel.
Start by drilling a starter hole near one corner, large enough for the jigsaw blade to enter. Insert the blade and carefully follow your marked lines. Keep the motion steady to maintain straight edges.
Stop slightly before reaching each corner, then use a chisel or fine saw to finish the angle precisely. Jigsaws tend to leave rounded inside corners, which can easily be squared off by hand.
For added precision, use a metal straight edge or clamped guide to direct your cuts. This keeps each line perfectly aligned.
Sand and file the edges after cutting to remove saw marks. The combination of jigsaw and chisel gives fast yet clean square openings suitable for utility or decorative use.
Finishing, Sanding, and Smoothing the Square Hole
Once your square hole is shaped, focus on finishing details. Use fine-grit sandpaper (180–220) to smooth the inside surfaces. Fold the paper tightly to reach corners without rounding them.
For deeper mortises, wrap sandpaper around a thin stick or dowel to polish the bottom and sides evenly. Clean all dust afterward with a soft brush.
If the hole will remain visible, apply a coat of wood finish, oil, or wax inside the walls. This protects the edges from moisture and prevents future swelling or cracking.
For painted projects, seal the interior with primer first. This keeps paint layers even and prevents blotches on porous wood.
Smooth, sealed holes not only improve appearance but also ensure long-term durability — a sign of care and skill in your work.
FAQ: Expert Answers About Drilling Square Holes
Can a regular drill make square holes?
No, drills make round holes. You must square them manually with chisels or use a mortising attachment.
What’s the easiest way to make a square hole?
Drill overlapping holes inside the outline, then clean corners with a sharp chisel or corner chisel.
What is a mortising bit?
It’s a drill bit enclosed in a square chisel that cuts square holes by combining drilling and chiseling.
How do I get sharp corners every time?
Use freshly sharpened tools, work slowly, and always cut along the grain first.
Can I use a router for square holes?
Yes, with a straight bit and template. Finish the corners manually for perfect right angles.
Why do my square holes look uneven?
Inconsistent pressure or dull tools cause rough edges. Keep cuts shallow and check alignment often.
What type of wood is easiest to chisel square holes in?
Softwoods like pine or fir are easiest. Hardwoods require sharper tools and slower cuts for accuracy.
Conclusion
Drilling a square hole in wood isn’t just about removing material — it’s about shaping accuracy through patience and control. While machines make the process faster, mastering manual methods builds true craftsmanship.
Whether you’re chiseling by hand, using a router template, or mortising with a drill press, the key is precision. Clean edges, straight sides, and sharp corners make the difference between rough work and artistry.
Each method you’ve learned in this guide has its purpose. Once you understand when and how to apply them, every square hole becomes a mark of professional skill.
So, next time a project demands perfect corners, you won’t hesitate. With steady hands, sharp tools, and focus, you’ll create square holes that fit beautifully and stand as proof of your mastery over the wood itself.

I’m John F. Nicholas, the founder, lead writer, and drill enthusiast behind 101drill.com. With years of hands-on experience in power tools and DIY projects, I created this platform to share practical knowledge, expert tips, and real-world insights to help others master the art of drilling.