
Changing a drill bit is one of the most basic yet essential skills for using a cordless drill effectively.
Research shows that nearly 35% of drilling errors happen because the bit was not inserted or tightened properly.
A loose or poorly fitted bit can slip during use, which not only damages materials but also increases the risk of injury.
Cordless drills are designed for quick bit changes, but many beginners struggle with the process.
Surveys reveal that over 60% of new drill users report difficulty the first few times they swap bits.
The good news is that learning the right steps makes the process safe, fast, and reliable.
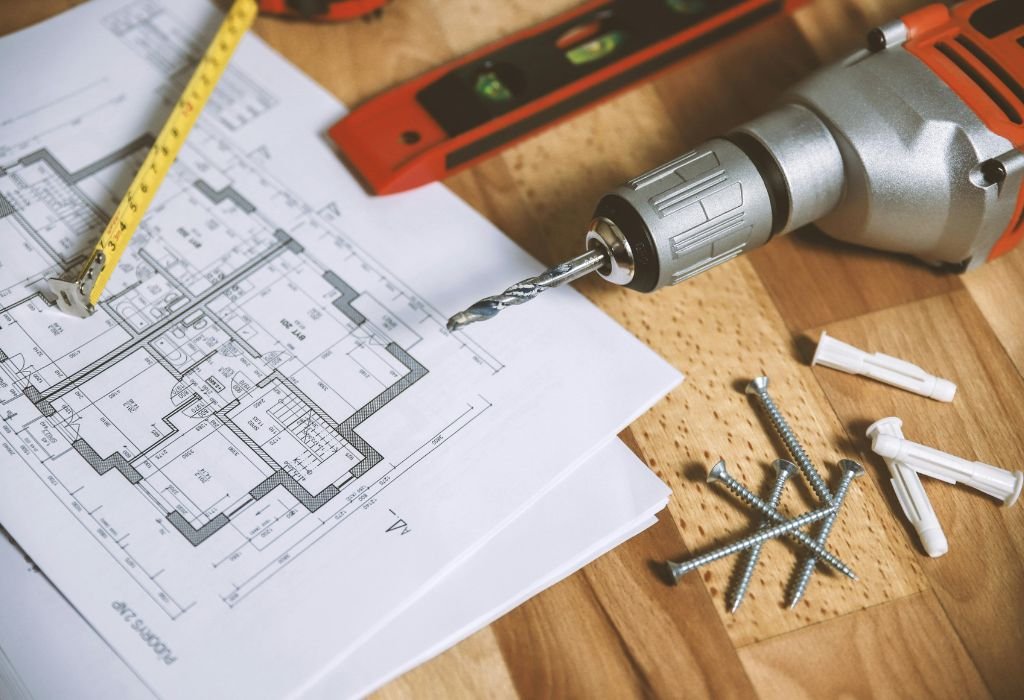
This guide will walk you through how to change a drill bit on a cordless drill, from preparation to testing, so you can drill with confidence.
Quick Overview (Skimmable)
Changing drill bits is an essential skill for safe and accurate drilling.
You’ll only need a cordless drill, the correct bit, and basic safety gear.
The process includes loosening the chuck, removing the old bit, and securing the new one tightly.
Always remove the battery and wear safety glasses before starting.
If bits get stuck or slip, simple troubleshooting steps will solve the problem.
Understanding Drill Bits and Chucks
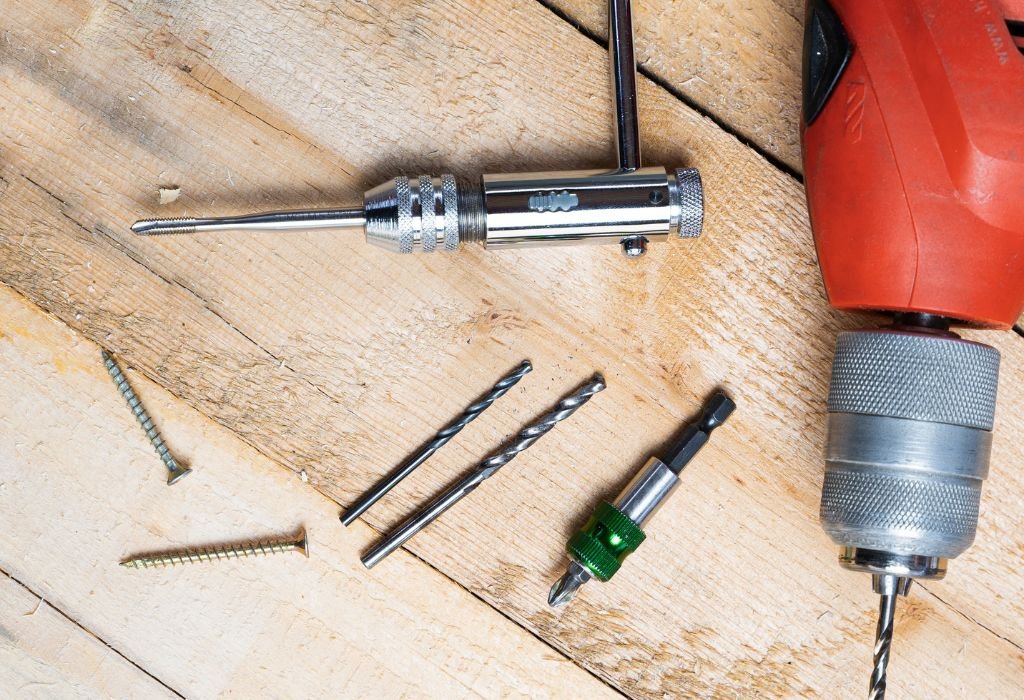
Drill bits are the cutting tools that allow your cordless drill to create holes in different materials. They come in various types such as twist bits, spade bits, masonry bits, and hole saws, each designed for a specific job.
Using the wrong bit not only reduces efficiency but also risks damaging the drill. Studies show that using mismatched drill bits and materials reduces tool life by up to 40%.
The chuck is the component at the front of the drill that holds the bit in place. Most cordless drills today use keyless chucks, which let you tighten and loosen by hand rather than with a key.
Standard chuck sizes are ⅜ inch and ½ inch, and knowing your drill’s chuck size is essential for selecting compatible bits. A bit that is too small or too large can slip, wobble, or fail to grip properly.
Some heavy-duty models still use keyed chucks, which require a small tool called a chuck key to tighten securely. While less common, keyed versions provide extra grip for demanding tasks like masonry drilling.
Tools and Safety Precautions
Before changing a drill bit, always remove the battery from your cordless drill. This simple step prevents accidental activation, which causes nearly 30% of drill-related injuries.
Wear safety glasses to protect your eyes from dust, debris, or slipping bits. Gloves are also recommended, especially when handling sharp or used drill bits.
You don’t need many tools for this process—just your drill, the new bit, and a stable surface. If your model uses a keyed chuck, keep the chuck key nearby for tightening.
Work in a well-lit, uncluttered space to avoid distractions. Research shows that poorly lit work areas double the chance of small tool accidents.
Finally, keep your drill bits organized in a case or holder. This prevents grabbing the wrong size and makes the process faster and safer.
Preparing the Cordless Drill for a Bit Change
Start by removing the battery pack from your cordless drill completely. This ensures no accidental trigger pull while your hands are near the chuck.
Set the drill to forward or neutral mode depending on your model. Forward mode makes it easier to open the chuck smoothly when loosening the jaws.
Place the drill on a flat, stable surface such as a workbench. This keeps the tool steady and prevents it from rolling while you prepare to change the bit.
Open the jaws slightly before removing or inserting a bit. This step reduces friction and makes the bit change process faster.
Wipe the chuck area with a clean cloth if you notice dust or debris. A clean chuck ensures proper grip and prevents bit slippage later.
Removing the Existing Drill Bit
Grip the chuck sleeve firmly with one hand to begin the process. Rotate it counterclockwise to loosen the jaws and release the drill bit.
Once the jaws open, pull the old bit straight out. Avoid tilting or twisting as this can damage the jaws or bend the bit.
If the bit feels stuck, rotate the chuck further until the jaws are fully open. A properly loosened chuck should let the bit slide out smoothly.
Store the removed bit in its case or a safe holder. Keeping bits organized reduces wear and helps you find the right one quickly next time.
If the bit is rusted or has debris, apply a drop of penetrating oil and wait a few minutes. This will free it without forcing and protect the chuck from scratches.
Inserting a New Drill Bit (Keyless Chuck)
Rotate the chuck counterclockwise to open the jaws wide enough for the new bit. Make sure the opening is slightly larger than the bit’s shank.
Insert the drill bit straight into the center of the jaws. An angled entry can cause wobbling and reduce drilling accuracy.
Turn the chuck clockwise by hand to close the jaws around the bit. Keep tightening until the bit feels snug and secure.
Run the drill briefly at low speed while holding the bit lightly in place. This helps center the bit and ensures the jaws grip evenly.
Check the alignment by pulling the bit gently to confirm it doesn’t slip. A properly seated bit should feel firm and stable inside the chuck.
Inserting a New Drill Bit (Keyed Chuck)
Insert the new drill bit straight into the center of the chuck jaws. Make sure it sits evenly and does not lean at an angle.
Place the chuck key into one of the holes on the chuck’s side. Turn the key clockwise to tighten the jaws securely around the bit.
Move the chuck key to the other holes and repeat tightening. Securing all sides ensures the bit is gripped evenly and prevents wobble.
Once tight, remove the chuck key and store it in a safe place. Many users lose the key, so keeping it clipped to the drill or in a toolbox is smart.
Give the drill bit a light pull to confirm it is firmly seated. If it moves or slips, re-tighten the jaws before starting your project.
Double-Checking Proper Installation
After inserting the bit, give it a gentle tug to make sure it doesn’t slip out. A properly tightened chuck should hold the bit firmly in place.
Run the drill briefly at low speed while pointing it away from yourself. Watch closely to see if the bit spins straight or wobbles.
Check that the jaws have closed evenly around the shank of the bit. Uneven tightening can lead to slipping during use and poor drilling results.
If you notice wobble, loosen the chuck and reinsert the bit carefully. Even a small angle at installation can reduce accuracy and cause damage.
Studies show that a correctly seated bit improves drilling precision by up to 25%. Taking a few extra seconds to check saves time and prevents errors later.
Changing Drill Bits Quickly During Projects

When working on large projects, switching bits quickly saves time and keeps workflow smooth. Quick-change bit holders are designed for this purpose and allow fast swaps without loosening the chuck completely.
Magnetic bit extensions make it easy to hold bits in place while switching. They also reduce the risk of dropping or losing small driver bits.
For tasks requiring frequent alternation between drilling and driving, consider using a drill-driver set. This setup allows you to swap between a drill bit and a screwdriver bit in seconds.
Keep the replacement bits organized in a belt clip or case close to your work area. Easy access to the right bit prevents delays and keeps the job moving.
By using these quick-change accessories, you can increase efficiency and reduce wear on the chuck. This not only saves time but also extends the life of your cordless drill.
Common Mistakes to Avoid
One of the biggest mistakes is forgetting to remove the battery before changing bits. This increases the risk of accidental activation and possible injury.
Another common error is inserting the bit at an angle. An uneven entry causes wobbling, reduces drilling accuracy, and can wear out the chuck jaws.
Failing to tighten the chuck completely is a frequent issue for beginners. A loose bit will slip during use, damaging both the material and the tool.
Some users overtighten the chuck, thinking it adds extra security. In reality, too much force can strip the jaws or crack the chuck sleeve over time.
Using the wrong type or size of bit is another avoidable problem. Always match the bit to the material and the chuck size for safe, efficient drilling.
Troubleshooting Problems with Drill Bits
If the bit keeps slipping inside the chuck, check whether the jaws are fully tightened. Retighten the chuck or switch to a larger bit if the shank is too small.
Wobbling during drilling often means the bit was inserted at a slight angle. Remove the bit, reinsert it straight, and tighten again to correct the problem.
Sometimes a bit can get stuck in the chuck due to dust, rust, or over-tightening. Apply a drop of penetrating oil and gently twist the chuck until it loosens.
If the jaws inside the chuck are damaged or worn, bits will not hold firmly. In such cases, replacing the chuck is the only reliable solution.
Overheating of bits during use can also make removal difficult. Let the drill cool down before attempting to change the bit to avoid burns or damage.
Maintenance Tips for Drill Bits and Chucks
Clean your drill bits after each use to prevent rust and buildup. Wiping them with a dry cloth or light oil helps maintain sharpness and durability.
Store drill bits in a protective case or organizer rather than loose in a toolbox. Studies show that bits stored improperly dull up to 30% faster due to friction and impact.
Lightly lubricate the chuck jaws every few months with machine oil. This keeps the mechanism smooth and reduces wear from frequent tightening.
Replace worn or dull bits instead of forcing them through material. Forcing blunt bits not only damages the drill but also reduces efficiency by nearly 25%.
Check your chuck periodically for cracks, debris, or rust. Early maintenance prevents costly replacements and extends the life of your cordless drill.
Do I need to remove the battery before changing a drill bit?
Yes, always remove the battery first to prevent accidental activation and ensure safety.
Can I change the drill bit with one hand?
It’s possible on some keyless chucks, but using two hands gives better control and prevents misalignment.
Why does my drill bit keep slipping inside the chuck?
This usually happens if the chuck is not tightened fully or the jaws are worn. Retighten or replace the chuck if needed.
Which way do I turn the chuck to loosen the drill bit?
Turn the chuck counterclockwise to loosen and clockwise to tighten.
Can I use any drill bit with a cordless drill?
Yes, as long as the bit fits your chuck size and is designed for the material you are working with.
What should I do if the drill bit is stuck in the chuck?
Apply penetrating oil and twist the chuck gently until it loosens. If it’s badly jammed, you may need pliers or professional servicing.
How tight should the drill bit be in the chuck?
It should be snug enough that it doesn’t move under pressure but not overtightened to the point of damaging the jaws.
Do cordless drills use keyed or keyless chucks?
Most modern cordless drills use keyless chucks, while older or heavy-duty models may still use keyed versions.
Why is my drill bit wobbling while I drill?
The bit may not be seated straight in the chuck or the jaws may have worn unevenly. Reinserting the bit usually fixes the issue.
Can I change from a drill bit to a screwdriver bit in the same drill?
Yes, cordless drills are versatile and allow quick swapping between drilling and driving bits.
How often should I replace my drill bits?
Replace them when they become dull, bent, or chipped. Using dull bits increases strain on the drill and reduces accuracy.
Is it safe to change drill bits without gloves?
It’s better to wear gloves, especially when handling used bits, since they may be hot or have sharp edges.
Conclusion
Changing a drill bit on a cordless drill is a simple but essential skill that improves safety and efficiency. With just a few careful steps, you can swap bits quickly and keep your projects moving smoothly.
By following the right preparation, securing the bit properly, and double-checking alignment, you avoid common mistakes that cause slipping or wobbling. These habits not only protect your drill but also extend the life of your bits.
Whether you are a beginner or an experienced DIY user, practicing the correct technique builds confidence. Once mastered, changing drill bits will become second nature and help you tackle any task with ease.

I’m John F. Nicholas, the founder, lead writer, and drill enthusiast behind 101drill.com. With years of hands-on experience in power tools and DIY projects, I created this platform to share practical knowledge, expert tips, and real-world insights to help others master the art of drilling.