
Long before electric drills became common in workshops, hand drills were the backbone of woodworking. Every precise hole in furniture, cabinetry, musical instruments, and fine joinery once relied on careful hand-powered drilling.
Even today, in an age of high-speed power tools, experienced woodworkers still reach for a hand drill when control, accuracy, and surface protection matter most.
Unlike power drills, a hand drill moves only as fast as the craftsman allows. There is no sudden torque, no violent pull, and no accidental tear-out caused by excessive speed.
This controlled motion makes hand drills ideal for delicate woodworking tasks such as pilot holes, dowel holes, small hardware installation, and drilling into thin or finished wood surfaces.
Using a hand drill properly is not a lost art. It remains one of the most precise and repeatable ways to drill clean, accurate holes in wood.
When understood correctly, a hand drill becomes more than a tool. It becomes an extension of the woodworker’s hands, allowing drilling with feel, feedback, and precision that no motorized drill can fully replicate.
This guide explains how to use a hand drill for woodworking, covers proper bit selection, drilling techniques, wood types, safety methods, accuracy control, and when a hand drill is the smartest tool choice over powered alternatives.
What a Hand Drill Is and Why Woodworkers Still Use It
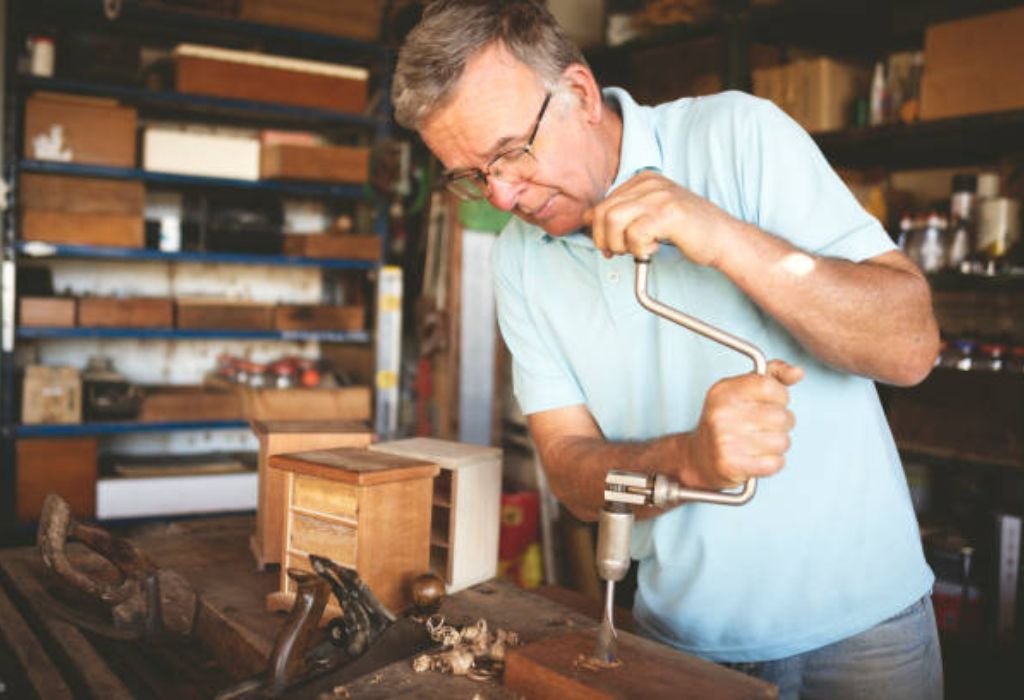
A hand drill is a manually powered drilling tool that operates through direct mechanical motion rather than electricity or compressed air. Most traditional hand drills use a crank-and-gear system that converts linear hand motion into smooth rotational movement of the drill bit.
Modern hand drills come in two primary styles. The first is the eggbeater-style gear drill, which uses a side crank and exposed gears to spin the chuck. The second is the brace-and-bit system, which uses a U-shaped brace to generate torque through body movement rather than finger strength.
Woodworkers still use hand drills because they offer unmatched speed control, tactile feedback, and surface protection.
Unlike power drills, which reach full torque almost instantly, a hand drill increases speed gradually. This allows the drill bit to establish a clean starting point without wandering or tearing wood fibers.
Hand drills also eliminate overheating. Power drills can scorch hardwoods, damage delicate veneers, and dull bits quickly due to excessive friction. A hand drill produces minimal heat, extending bit life and protecting surrounding wood fibers.
Another reason hand drills remain essential in woodworking is noise and workspace control. They operate silently, produce no dust clouds, and allow the craftsman to hear and feel what the bit is doing inside the wood.
Key Advantages of Using a Hand Drill for Woodworking
The biggest advantage of a hand drill is precision. Because the user controls both speed and pressure manually, holes can be started exactly where intended without skating or wandering.
This is especially important when drilling near edges, into narrow stock, or into pre-finished surfaces.
Hand drills also allow perfect depth control. Because drilling happens gradually, the craftsman can feel resistance change as the bit reaches full depth, avoiding sudden punch-through that damages the opposite side of the wood.
Another major benefit is tear-out prevention. High-speed power drills often rip fibers as the bit exits the wood. With a hand drill, exit pressure is controlled carefully, resulting in cleaner backside holes.
Hand drills excel at minor corrections. If the angle is slightly off during entry, the user can adjust direction mid-drill without snapping the bit. This makes them ideal for hinge installation, hardware mounting, and dowel alignment.
They also eliminate battery failure, cord limitations, and electrical hazards, making them essential for field woodworking, restoration work, and historical craftsmanship where electricity is not available or not permitted.
Types of Hand Drills Used in Woodworking
There are two main families of hand drills used for woodworking.
Eggbeater Hand Drill
This is the most common manual drill used today. It features:
- A side crank
- Exposed gears
- A three-jaw chuck
- Lightweight frame
It is ideal for:
- Small pilot holes
- Screw pre-drilling
- Dowel holes
- Light hardware mounting
Eggbeater drills provide fast rotation with moderate torque, making them excellent for softwoods and general woodworking.
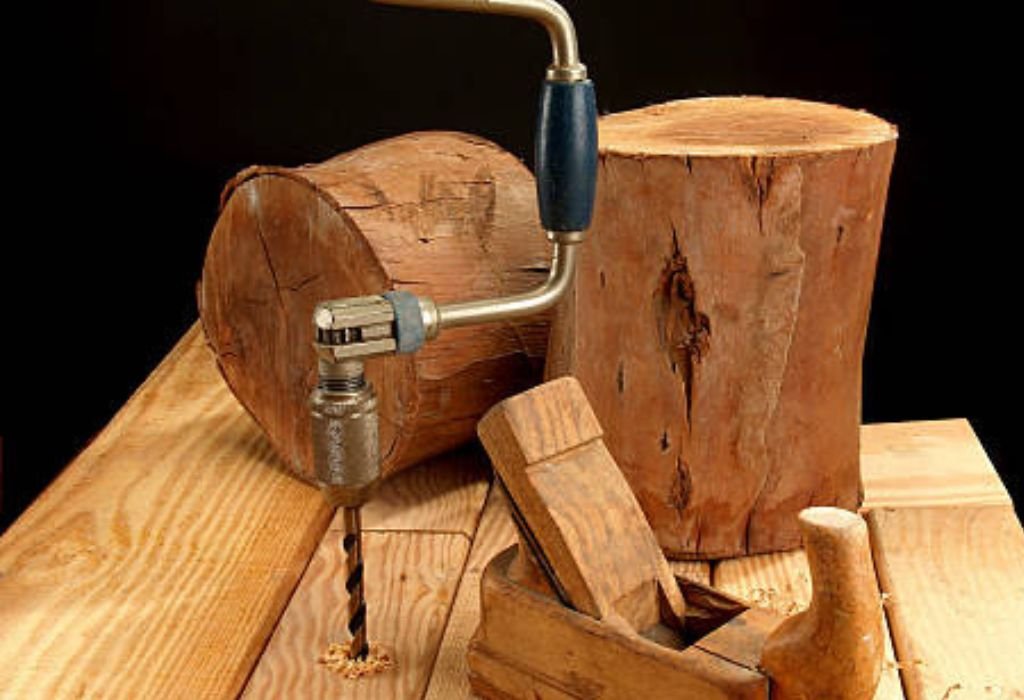
Brace and Bit Drill
This traditional woodworking tool uses large bits and generates massive torque through body leverage. It is designed for:
- Large diameter holes
- Mortising
- Joinery
- Deep boring
The brace is irreplaceable for heavy woodworking tasks where power drills struggle to maintain control.
Each type has a specific purpose in the woodshop, and many experienced woodworkers use both depending on the task.
Best Woodworking Tasks for a Hand Drill
Hand drills shine in tasks that demand accuracy and surface protection.
They are ideal for:
- Pilot holes for screws
- Dowel holes in joinery
- Drilling into veneer or thin plywood
- Furniture hardware installation
- Small hinge and latch mounting
- Restoration and antique woodworking
- Model making and fine craft
They are less suitable for:
- Repetitive production drilling
- Large-diameter Forstner bit operations
- Thick hardwood boring at scale
In fine woodworking, the hand drill is chosen not because it is faster, but because it produces cleaner, safer, and more controllable results.
Selecting the Right Drill Bits for Hand Drilling in Wood
Bit choice determines hole quality more than drill type. Hand drills require sharp, properly shaped, low-friction bits.
Brad Point Bits
These are the most important bits for woodworking hand drilling. They feature a center spur that prevents wandering and outer cutting spurs that slice wood fibers cleanly. They create perfectly round, tear-free holes.
Twist Bits for Wood
Standard twist bits can be used, but they are more likely to wander. They work best for deep pilot holes where surface cleanliness matters less.
Auger Bits
Used primarily with brace drills for large holes. These bits pull themselves through wood using a threaded tip and sliced cutting edge.
Spade Bits
Generally not recommended for hand drilling because they require high speed and tear out easily.
Sharpness is critical. A dull bit makes hand drilling slow, inaccurate, and physically exhausting.
How to Mark Hole Locations for Perfect Accuracy
Accurate hand drilling begins with accurate hole marking. Unlike power drills, a hand drill follows the guide point exactly. If the mark is wrong, the hole will also be wrong.
Use a sharp pencil, marking knife, or awl to create a clear center point. For joinery, use layout tools such as:
- Combination square
- Marking gauge
- Center punch
For delicate veneer surfaces, use masking tape and mark on the tape to avoid surface damage.
A properly punched center mark prevents the bit from skating on the surface and ensures the hole starts exactly where intended.
Correct Body Position and Hand Grip for Hand Drilling
Proper posture ensures straight holes and prevents fatigue.
- Stand so your shoulder is directly above the drilling point.
- Keep your wrist straight to prevent angular drift.
- Apply downward pressure with controlled wrist rotation.
- Use steady, smooth turns instead of jerky motion.
- Keep your eyes aligned with the drill bit vertically.
When drilling vertically, many woodworkers rest their opposite hand lightly near the drill tip to sense angle alignment and vibration.
This physical feedback is a major advantage of hand drilling over power drilling.
Drilling Technique for Softwood vs Hardwood
Wood type plays a major role in how a hand drill behaves. Softwoods such as pine, cedar, fir, and spruce cut easily and require light pressure. If too much force is applied, the bit can dive suddenly and cause tear-out on the exit side.
With softwoods, the best technique is slow initial rotation followed by steady, moderate pressure once the bit is seated.
Hardwoods such as oak, maple, walnut, teak, and mahogany demand more torque and patience. The bit encounters more resistance, which means pressure must increase gradually to avoid stalling the drill or snapping the bit.
Drilling hardwoods with a hand drill is always a slower process, but it provides superior control and prevents overheating that can damage both wood fibers and cutting edges.
In hardwood, back the bit out every few turns to clear chips. This reduces friction and improves cutting speed. In softwood, chip clearance is less critical but still improves hole cleanliness.
Matching drilling pressure to wood density is essential. Too little pressure in hardwood causes friction without cutting. Too much pressure in softwood causes splitting and exit blowout.
How to Prevent Wood Splitting When Using a Hand Drill
Splitting usually occurs near the edge of a board or at the exit side of the hole. The most effective prevention method is drilling at controlled speed with proper backing.
Always place a scrap block of wood underneath the exit side of the workpiece. As the bit breaks through, it enters the scrap instead of ripping fibers out of the finished piece. This single step eliminates most tear-out.
Drilling pilot holes is another critical prevention method. Large screws driven into wood without pilot holes force fibers apart and cause cracking. A properly sized pilot hole allows the screw to cut threads without forcing the wood to split.
On delicate or narrow stock, reduce speed and pressure as the bit approaches full depth. This prevents sudden punch-through.
For brittle hardwoods, slightly chamfering the hole entrance with a countersink bit further reduces stress concentration and prevents surface cracking.
How to Drill Perfectly Straight Holes Without a Drill Press
Drilling straight holes by hand requires visual alignment, muscle memory, and controlled movement.
The most effective method is the two-direction check. Align the drill vertically from the front view, then rotate your body slightly and check alignment from the side view before beginning. Keep correcting until both views appear vertical.
Some woodworkers use a small square placed next to the bit as a visual reference while drilling. Others rely on reflection techniques using shiny bit surfaces.
Drill slowly for the first few millimeters. Once the bit is established straight, it will naturally follow that path unless forced off-angle.
If extreme precision is required, a simple wooden guide block drilled on a drill press can be placed on the work surface. The hand drill follows this guide to guarantee vertical accuracy.
Straight drilling is one of the strongest advantages of hand drills because speed is low and positioning corrections are always possible mid-cut.
Depth Control Methods for Hand Drilling
Hand drills do not have electronic depth stops, but depth control is easily achieved using manual methods.
The simplest method is wrapping tape around the bit at the desired depth. When the tape reaches the surface, drilling stops instantly. This works well for pilot holes and dowel holes.
For deeper work, a wooden depth collar can be slid over the bit and tightened with a small set screw. This provides a reusable depth stop for repetitive drilling.
In furniture work, dowel holes must match dowel length precisely. Drilling too deep weakens joints. Drilling too shallow prevents full seating. Tape markers are usually sufficient for this level of control.
Experienced woodworkers also rely on tactile feedback. As the bit reaches full depth, resistance changes and chip flow stops. This tactile response is something power drills completely remove.
Speed Control for Different Woodworking Situations
Manual drills offer natural speed control, but knowing how fast to rotate still matters.
Slow speed is ideal for:
- Starting holes
- Drilling near edges
- Veneer surfaces
- Hardwood
- Small bit sizes
Moderate speed is ideal for:
- Pilot holes
- Softwood boring
- Hardware installation
High speed is rarely needed for hand drills, but can be useful for shallow holes in soft pine or plywood.
Excessive speed causes:
- Tear-out
- Overheating
- Rapid bit dulling
- Loss of directional control
Smooth, steady rotation always produces superior results compared to aggressive cranking.
Common Hand Drilling Mistakes and How to Fix Them
One of the most common mistakes is using dull bits. Dull bits require excessive force, wander off-center, and burn wood. Sharpen or replace bits regularly.
Another frequent error is applying too much pressure too early, which causes skating and misalignment. Always start drilling gently.
Skipping center marks causes wandering. Always punch a reference point before drilling.
Wrong bit selection also ruins results. Using twist bits instead of brad-point bits increases tear-out risk.
Finally, drilling without backing support leads to exit blowout. A simple scrap board prevents this permanently.
Every mistake beginners make with hand drills comes from rushing. Precision drilling is slow, controlled work.
Essential Safety Rules for Using a Hand Drill in Woodworking
Hand drills are safer than power drills, but they are not harmless.
Always:
- Secure the workpiece with clamps
- Keep fingers away from the bit path
- Wear eye protection
- Store bits safely when not in use
- Avoid drilling toward your free hand
- Maintain firm footing and posture
Never hold small pieces in your palm while drilling. Always clamp or secure them to a bench or vise.
If a bit jumps or binds, stop immediately. Forcing rotation causes wrist strain and broken bits.
Respect the torque of brace drills. Large auger bits can cause sudden rotational force if they bind.
Safety with hand tools is not about guarding against speed. It is about guarding against leverage and stored energy.
Maintaining a Hand Drill for Long-Term Performance
A well-maintained hand drill can last generations. Keep gears clean and lightly lubricated with machine oil. Dry gears increase friction and wear rapidly.
Inspect chucks for jaw wear. Loose jaws cause bit slippage and misalignment. Check handles and grip knobs for cracks. Any looseness reduces control.
Store the drill in a dry place to prevent rust. Lightly oil exposed steel surfaces if humidity is high. Bits should be sharpened regularly. Dull bits destroy precision more than any tool defect. With basic care, hand drills remain as accurate after 50 years as the day they were made.
When a Hand Drill Is Better Than a Power Drill in Woodworking
Despite modern tools, hand drills remain superior in many woodworking situations:
- Antique furniture restoration
- Veneer drilling
- Small pilot holes
- Dowel joinery
- Hardware installation
- Musical instrument making
- Model building
- On-site woodworking without power
Whenever the surface must remain perfect, fiber tear must be eliminated, and precision matters more than speed, the hand drill is the superior tool.
Conclusion
A hand drill remains one of the most precise and controllable tools in woodworking. While power drills dominate modern workshops, they cannot match the tactile feedback, surface protection, and fine control that only manual drilling provides.
With a hand drill, speed, pressure, and direction are controlled entirely by feel. This makes it ideal for delicate joinery, pilot holes, veneer work, hardware installation, and restoration projects where mistakes cannot be hidden.
Understanding proper bit selection, marking techniques, body alignment, wood-specific drilling methods, and depth control turns a simple hand drill into a professional-grade precision instrument.
Preventing splitting, eliminating tear-out, and drilling perfectly straight holes become reliable skills rather than lucky outcomes.
Hand drills also teach discipline and patience. Every hole becomes intentional. Every adjustment becomes deliberate. This level of control builds craftsmanship that directly transfers into higher-quality woodworking.
With proper maintenance, a hand drill can serve for decades without losing accuracy or performance.
In a workshop filled with motors and machines, the hand drill still holds a permanent place as the tool that delivers quiet precision, complete control, and unmatched accuracy in fine woodworking.

I’m John F. Nicholas, the founder, lead writer, and drill enthusiast behind 101drill.com. With years of hands-on experience in power tools and DIY projects, I created this platform to share practical knowledge, expert tips, and real-world insights to help others master the art of drilling.