
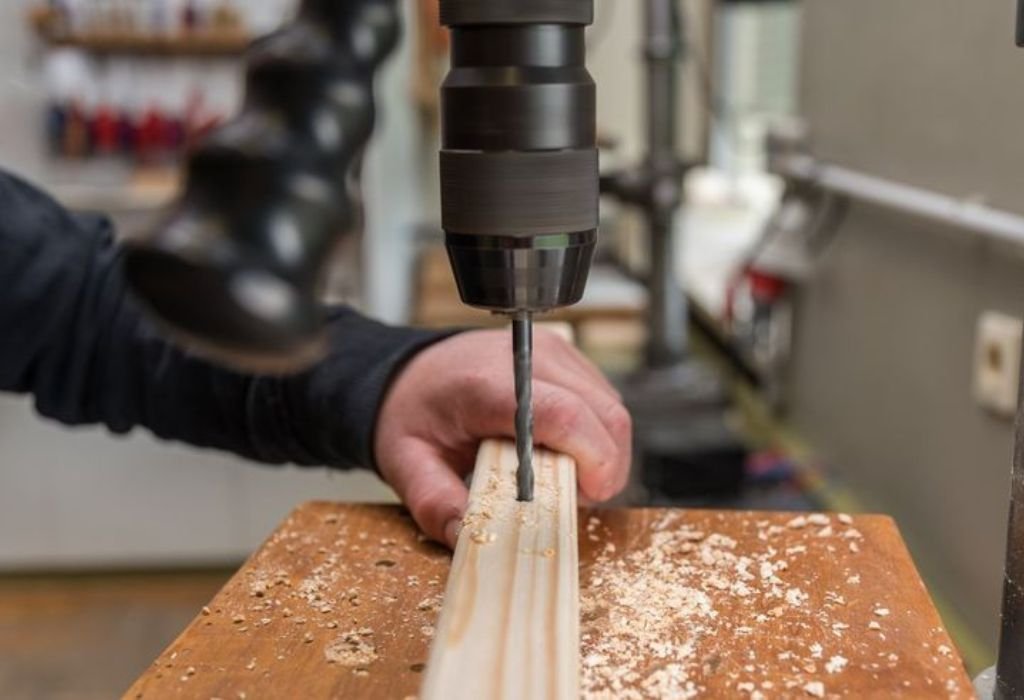
You’re in your workshop, the smell of sawdust in the air, and you reach for a drill bit from your toolbox. The problem? You’re not sure if it’s meant for wood or metal.
You attach it anyway, start drilling, and within seconds, smoke rises or the bit dulls instantly. You realize you picked the wrong one.
Every DIYer and professional faces this confusion at some point. Drill bits look deceptively similar, especially once they’ve been used and worn. But using the wrong bit doesn’t just slow down your work — it can damage your project, ruin your drill, or even become a safety hazard.
Wood and metal bits are designed for completely different materials. Each has a specific geometry, hardness, and purpose. Knowing how to tell them apart saves time, money, and frustration.
In this detailed guide, you’ll learn exactly how to distinguish between wood and metal drill bits using their tips, flutes, color, and feel. By the end, you’ll confidently pick the right bit every time, even from a mixed pile.
Why It’s Important to Identify the Right Drill Bit
Drilling might seem simple, but every material reacts differently to a spinning bit. Wood fibers tear easily, while metal requires slow, steady cutting pressure. That’s why using the correct bit matters so much.
A metal bit on wood might still make a hole, but it often burns the surface and leaves rough edges. A wood bit on metal, however, quickly dulls or breaks due to the hardness mismatch.
The wrong bit not only ruins the work surface but also risks overheating your drill motor. Over time, these small mistakes add up, reducing both tool life and precision.
Proper identification ensures clean holes, smoother finishes, and efficient drilling. It also prevents injuries caused by snapped bits or kickback from forcing tools through unsuitable materials.
Understanding the key visual and tactile differences between bit types is your first step toward safe, skillful craftsmanship.
Understanding How Drill Bits Are Designed
Every drill bit is engineered for a specific purpose. The differences start with the tip design, continue through the flute shape, and extend to the material composition.
Wood bits are built to cut quickly and eject chips easily. Their flutes are wide and deep to allow sawdust to escape as the bit spins. Most feature sharp points that grab the wood instantly without sliding.
Metal bits, on the other hand, are designed for precision and durability. They must slice through hard surfaces gradually without overheating or dulling. Their cutting edges are shorter, the flutes narrower, and the tips less pointed.
This engineering reflects the basic difference between soft, fibrous wood and tough, dense metal. Recognizing these design cues will help you identify bit types at a glance.
Identifying Wood Drill Bits by Their Tip Shape
The easiest way to identify a wood drill bit is by looking at its tip. Wood bits almost always feature a sharp central point known as a brad point or spur. This point helps the bit stay centered when starting a hole, preventing it from wandering on smooth surfaces.
On either side of that central spur, you’ll notice two outer cutting spurs that slice the wood fibers cleanly before the main cutting edges remove material. This design produces crisp, tear-free holes, especially in plywood or hardwood.
If you look closely, the overall shape resembles a miniature spearhead. The sharp point immediately catches into the wood when pressure is applied.
These tips make wood bits perfect for furniture making, cabinetry, and any project requiring precise hole placement. However, that same sharp point makes them unsuited for metal, as it can bend or break under stress.
Whenever you see a bit with a sharp center tip and wide flutes, it’s almost always designed for wood.
Recognizing Metal Drill Bits by Their Tip and Edge
Metal drill bits have a noticeably different tip. Instead of a sharp point, they usually feature a conical, flat, or chisel-shaped tip formed at a 118° or 135° cutting angle.
This shape allows gradual penetration into hard materials like steel, aluminum, or copper. The flatter tip doesn’t grab the surface but instead scrapes away thin layers of metal.
The cutting edges appear shorter and smoother, almost polished. You’ll also notice that the very end of the bit feels less pointed and more blunt. This helps distribute pressure evenly across the tip, preventing sudden snapping.
Unlike wood bits, metal bits rely on speed control and lubrication for efficiency. When examined closely, they feel heavier and more solid due to their hardened steel or cobalt construction.
If the tip looks angled rather than spiked and feels robust, you’re holding a metal drill bit.
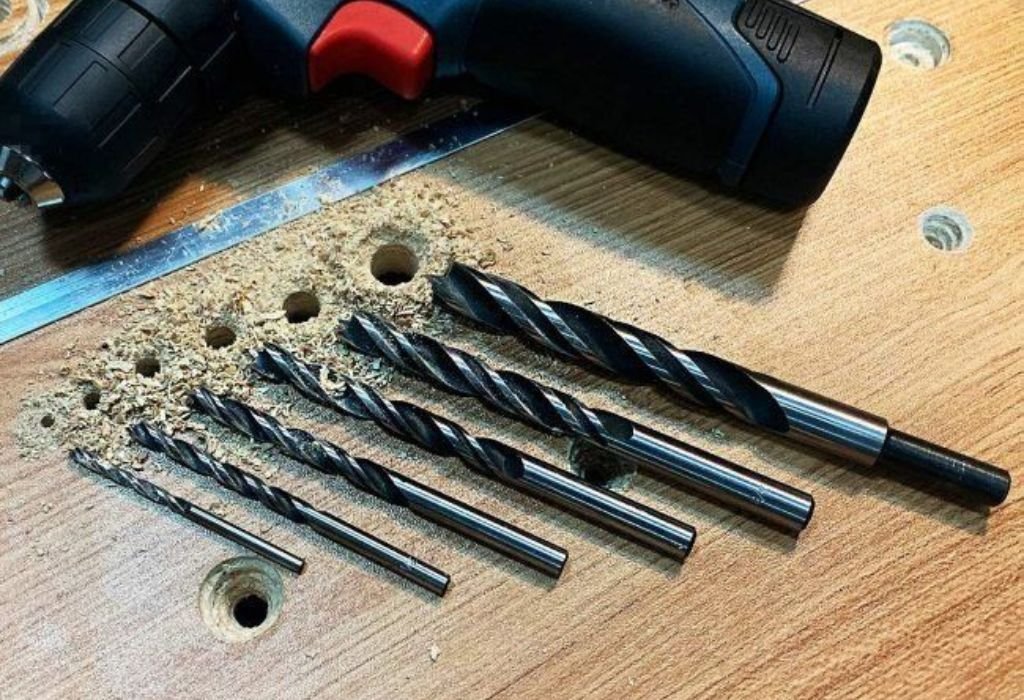
Comparing the Flute Design of Wood and Metal Bits
The flutes — the spiral grooves running along the shaft — are another clear indicator of the bit’s purpose.
Wood drill bits have wider, deeper flutes. These are designed to remove sawdust efficiently, preventing clogging and overheating. When you look at a wood bit, the grooves seem aggressively carved and spacious.
Metal bits, in contrast, have narrower, shallower flutes. Metal shavings, or swarf, are dense and heavy, so these flutes are optimized for control rather than volume. The smaller grooves help guide chips upward slowly while maintaining stability.
Another difference lies in the finish: wood bits often appear rough or matte, while metal bits are polished to reduce friction.
Once you learn to compare the flute width and smoothness, distinguishing between bit types becomes second nature.
Color and Material Differences
Color can be a surprisingly helpful clue. Although drill bit coatings vary, each serves a purpose that hints at its intended material.
Wood drill bits are typically black or silver and made from high-carbon steel. They may have no special coating because wood doesn’t require high heat resistance.
Metal bits, on the other hand, often appear gold, bronze, or dark gray. These coatings — such as titanium nitride (TiN) or black oxide — reduce friction and heat during metal cutting.
A shiny golden or bronze surface almost always means a bit designed for metal drilling. Titanium coatings, in particular, extend bit life when cutting steel or aluminum.
While color alone isn’t always definitive, combining it with tip shape and flute style gives an accurate identification nearly every time.
Testing a Drill Bit by Feel and Sharpness
Your fingers can often tell what your eyes might miss. When you run your fingertip gently across a wood bit’s tip, you’ll feel a sharp central point with defined outer edges. It’s designed to pierce soft fibers instantly.
A metal bit, in contrast, feels smoother at the tip and sharper along the cutting edges instead. The cone shape feels symmetrical and uniform without a central spur.
If you drag the bit lightly across a piece of scrap wood, a wood bit bites immediately while a metal bit slides slightly before cutting.
This simple tactile test is quick and effective, especially when identifying bits from a mixed drill set. Always handle bits carefully — they can still be sharp enough to cut skin.
Over time, you’ll learn to distinguish types purely by the balance and texture in your hand.
Special Drill Bits That Work for Both Materials
Some bits are designed as multi-purpose tools, capable of drilling both wood and metal, but they come with trade-offs. These include combination bits, step bits, and titanium-coated twist bits.
While these hybrid bits offer convenience, they rarely match the precision of dedicated types. For example, a titanium twist bit can cut through both wood and thin metal, but it may leave rougher edges in wood compared to a brad-point bit.
Step bits, which resemble cones with multiple diameters, are ideal for thin sheet metal but can also create large holes in plywood.
If you use multi-purpose bits, drill slowly and avoid forcing them through hard material. They’re best suited for quick fixes, not fine woodworking or heavy fabrication.
Understanding these in-between tools helps you decide when versatility outweighs specialization.
Common Mistakes When Using the Wrong Bit
Using a wood bit on metal or a metal bit on wood can cause serious problems beyond just poor results.
A wood bit used on metal dulls instantly. The fine point overheats and deforms, making it useless even for wood afterward. You’ll also notice smoke or a burnt smell from friction.
A metal bit used on wood may still drill a hole, but it tears the fibers and leaves rough, splintered edges. The smaller flutes clog quickly with sawdust, generating unnecessary heat.
Forcing the wrong bit through a material risks breaking both the bit and your workpiece. Always identify the bit type before drilling.
Recognizing early signs of misuse — such as excessive heat, burning, or chattering — helps prevent irreversible damage to tools and materials.
How to Organize Drill Bits to Avoid Confusion
Keeping your bits organized not only saves time but also protects them from wear. Use a labeled storage case or drawer to separate wood, metal, and masonry bits.
If your bits are mixed, take time to sort them by type and mark them using permanent ink or color-coded sleeves. A simple dot of paint on the shank can instantly tell you which material it’s for.
Store bits in a dry environment to prevent rust. Even titanium-coated bits corrode if left in moisture for too long.
After each use, wipe them clean with a soft cloth to remove dust or oil residue. Proper storage ensures longevity and helps you avoid the constant guesswork of figuring out which bit is which.
Once organized, you’ll immediately recognize the right tool for every job.
When to Replace Your Drill Bits
Even the best drill bits lose sharpness over time. The more you use them, the more friction dulls their edges, leading to slower performance and overheating.
Signs that it’s time to replace or resharpen include squeaking, excessive smoke, rough holes, or visible dulling at the tip. If the bit struggles to start a hole without slipping, it’s past its prime.
For wood bits, look for flattened spurs or a worn brad point. For metal bits, check for rounded cutting edges or discoloration from heat.
You can sharpen metal bits using a bench grinder, but wood bits often need professional sharpening tools to restore their fine tips.
Using dull bits not only ruins materials but also forces your drill to work harder, shortening its lifespan. Regular inspection keeps your toolkit efficient and ready for precision work.
FAQ: Common Questions About Wood vs. Metal Drill Bits
How can I tell if my drill bit is for wood or metal?
Check the tip shape. Wood bits have a sharp center point; metal bits have a flat or conical tip.
What happens if I use a wood bit on metal?
It dulls instantly, overheats, and may break. Wood bits aren’t hardened enough for metal.
Can I use metal bits on wood?
Yes, but expect rougher holes. They won’t cut cleanly through soft fibers like wood bits do.
Are titanium-coated bits only for metal?
Mostly, yes. They handle high heat better and are ideal for steel and aluminum drilling.
What’s the best bit for both wood and metal?
High-speed steel (HSS) bits with titanium coating can handle both, though not as precisely as specialized bits.
Do color differences always indicate type?
Not always, but gold or bronze usually means a metal bit, while plain silver or black suggests wood.
Can I sharpen both types?
Yes, but techniques differ. Metal bits are ground at precise angles; wood bits require sharper spurs and points.
Conclusion – The Eye of a Skilled Builder
Being able to tell the difference between wood and metal drill bits isn’t just a technical skill — it’s a sign of true craftsmanship. Each bit tells a story through its design, tip, and weight. Once you learn to recognize these details, you’ll never second-guess yourself again.
Drilling becomes smoother, cleaner, and faster when you choose correctly. Your tools last longer, your work looks better, and your confidence grows with every project.
Precision starts long before you pull the trigger. It begins the moment you select the right bit for the job.
So next time you reach into your toolbox, take a closer look. The right choice turns a simple hole into a perfect one — and that’s what separates a hobbyist from a craftsman.

I’m John F. Nicholas, the founder, lead writer, and drill enthusiast behind 101drill.com. With years of hands-on experience in power tools and DIY projects, I created this platform to share practical knowledge, expert tips, and real-world insights to help others master the art of drilling.