
Drilling a hole in a glass bowl can look simple until the first one cracks suddenly. Many people try it with confidence only to hear a sharp popping sound and watch the bowl split apart. What was supposed to be an easy project turns into stress and confusion within seconds.
The problem begins with how fragile curved glass really is. A bowl cannot distribute pressure evenly the way a flat tile can during drilling. One small mistake with speed or angle is enough to damage the entire surface.
Some people stop after the first failure because they think only professionals can drill glass safely. Others continue trying without understanding why the bowl keeps cracking. In both situations the missing piece is technique not talent.
There are also stories from people who succeed on their very first attempt. They move slowly keep the bowl cool and let the drill bit grind instead of push. The hole comes out clean and smooth without any chips or stress marks.
This guide is made for anyone who wants that safe and successful result. You will learn how to prepare the bowl support it correctly and use the right drill bit before starting. Each step is explained clearly so you know exactly what to do and what to avoid.
Why Glass Bowls Crack When Drilling
Glass bowls are curved which creates uneven tension when pressure is applied. Unlike flat tile the rounded surface does not distribute force evenly across the structure. This makes drilling more challenging and more likely to crack without warning.
Temperature also affects glass bowls quickly. Heat from drilling builds faster because the curved surface traps warmth. Without cooling the stress spreads and forms star-shaped cracks.
People often assume drilling a bowl is similar to drilling tile. The smooth interior and exterior make the drill bit slip easily. Slipping creates scratches and weak points that can break under pressure.
The thickness of glass bowls also varies. Some are thin for decorative use while others are thicker for mixing. Knowing what type of glass you have helps you adjust your drilling speed and pressure.
Understanding why bowls crack helps prevent damage. With the correct method drilling becomes slow controlled and predictable. This guide keeps the bowl protected from avoidable mistakes.
Tools and Safety Gear You Need Before Starting
A variable speed drill is required for safe drilling. Low RPM allows gradual grinding instead of cutting through the glass. Slow control reduces friction that leads to cracking.
Diamond coated drill bits work best for glass bowls. They grind through the surface without creating sudden pressure. Spear point bits are ideal for small holes and precise positioning.
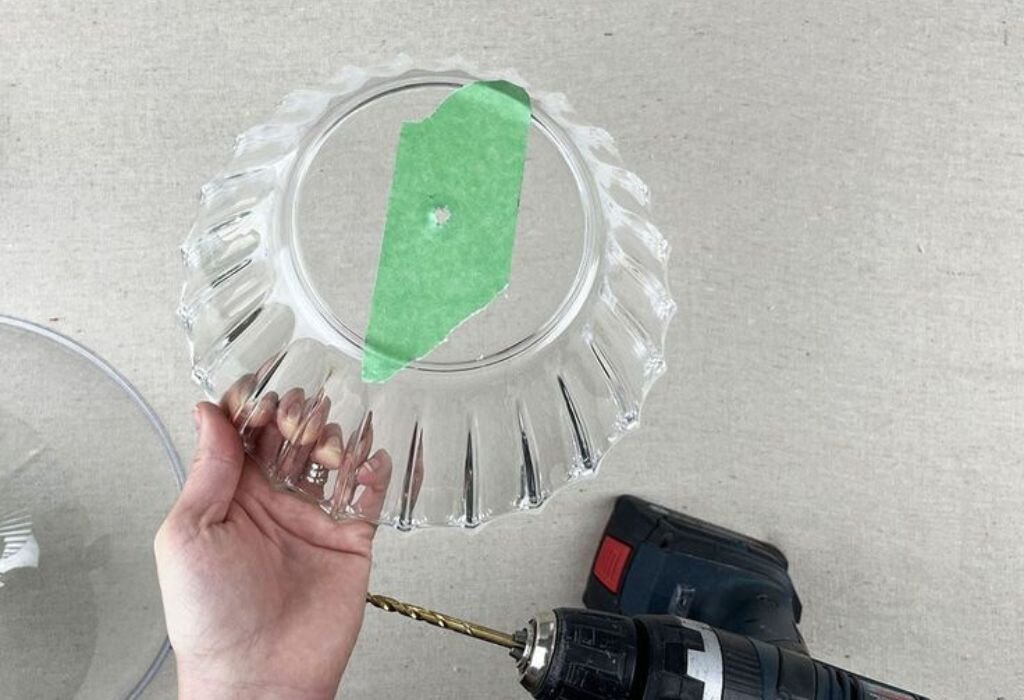
Masking tape helps the bit stay in place on the curved surface. Without tape the bit slips quickly due to the smooth round shape. Tape also protects the surface from early chipping.
Water is necessary for cooling the drilling spot. A spray bottle or small running stream prevents heat buildup. Cooling is the key to preventing thermal stress during drilling.
Safety glasses and gloves should always be used. Small glass particles can fly when drilling begins. Protection keeps the process safe and controlled.
Preparing the Glass Bowl for Drilling
Clean the bowl to remove dust fingerprints and oil. A clean surface helps tape stick firmly during drilling. Dirt makes the drill bit slip more easily.
Place masking tape inside and outside the bowl. This reduces chipping on both contact points. Mark the drill location using a fine tip marker for accuracy.
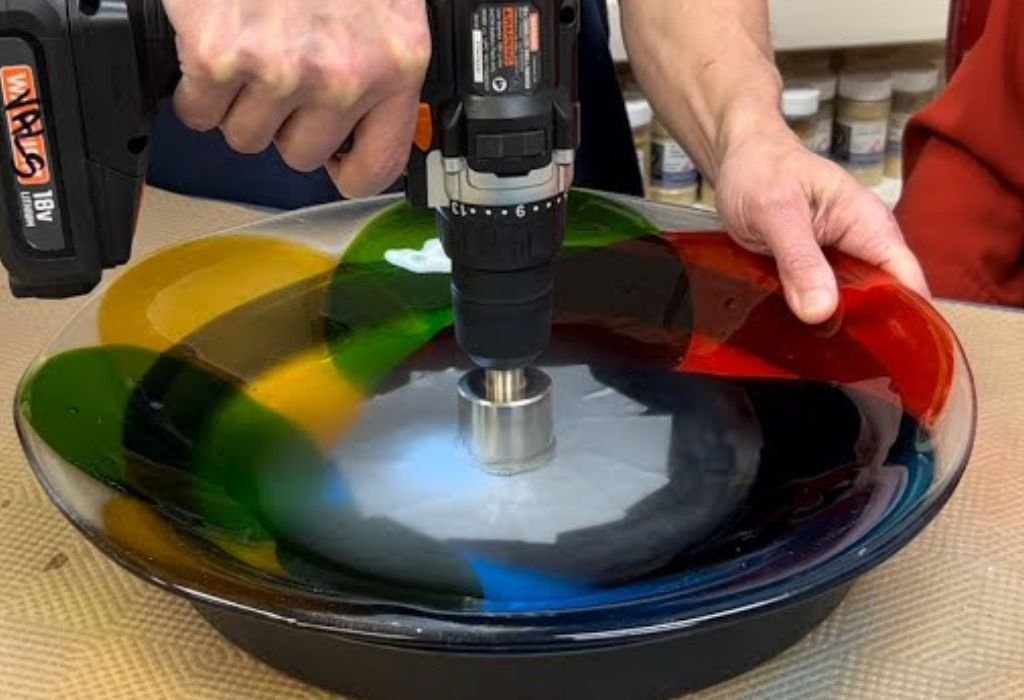
Support the bowl to prevent movement. A rolled towel or foam ring keeps the bowl stable without pressure. Never hold the bowl in your hands while drilling.
Check what is underneath the drilling area. A wooden board or soft pad helps absorb vibration. Avoid drilling over hard stone surfaces that reflect impact.
If the bowl is thin use slower drilling and lower pressure. Thicker bowls require patience but are less fragile. Preparing properly prevents unexpected breakage.
Can I drill the bowl without using tape?
Tape helps prevent slipping and chipping and should always be used for safety.
How do I stabilize a round glass bowl while drilling?
Place it on a towel or foam ring so the surface stays supported without rolling.
Should I remove the bowl label before drilling?
Yes labels trap moisture and reduce tape grip which affects drilling accuracy.
Can I drill near the rim of a glass bowl?
Avoid drilling close to the rim because that area is weaker and more fragile.
How do I mark the exact center without smudging?
Use a fine waterproof marker and let it dry before applying tape.
Choosing the Right Drill Bit for Glass Bowls
Diamond coated bits are designed for grinding without force. They remove material slowly which keeps the bowl stable. The smooth finish prevents cracking around the hole.
Spear point bits work best for small precise holes. They start easily on curved surfaces without wandering. This makes them ideal for drilling the bottom of a bowl.
Core bits are useful for wider openings. The hollow center removes glass more evenly than standard bits. They reduce pressure on the bowl during drilling.
Quality matters when choosing diamond bits. Cheaper coatings wear off quickly and increase heat. A worn bit increases friction and stress on the bowl.
Using the exact bit size prevents widening later. Enlarging a hole is risky because it stresses the glass. Planning the size ahead ensures cleaner results.
How to Start Drilling Without Slipping
Start with the drill at the lowest possible speed. High speed causes the bit to skid across the glass instantly. Slow movement helps create a small indentation.
Hold the drill at a slight angle for the first few seconds. This helps the bit catch the surface gently. Once it bites straighten the drill to a vertical position.
Do not apply pressure when starting. Allow the bit to grind lightly into the tape. Forcing the drill creates fractures before the hole begins.
Use both hands to maintain stability. One hand controls speed while the other balances direction. This reduces shaking on the curved surface.
Stop immediately if the bit skips. Reposition and restart slowly with better grip. Skipping weakens the bowl and causes hidden cracks.
Drilling Speed Pressure and Cooling Explained
Speed determines how much heat builds during drilling. Keep the drill between 400 and 600 RPM for safety. Higher speed quickly overheats the bowl.
Pressure should always be light. Let the drill bit grind through gradually. Heavy force increases vibration and cracking risk.
Water must be applied continuously. Cooling prevents thermal stress on the curved surface. Spray or drip water slowly to keep the area wet.
Take short breaks during drilling. Pausing allows the bowl to cool naturally. This prevents heat from spreading across the glass.
Keep the bit clean during drilling. Glass dust reduces grinding efficiency. Cleaning improves performance and reduces friction.
Why does the drill bit stop cutting while drilling?
The bit may be dull or overheated so cooling and cleaning restores cutting action.
How much pressure should I apply while drilling?
Use only light hand pressure and let the bit grind rather than push forward.
Can I drill faster if I use a lot of water?
No speed must remain low because water controls heat not drilling force.
Why is the hole making a squeaking sound?
The bit may be dry so add more water to reduce friction and stress.
What if the bowl feels warm while drilling?
Stop immediately and cool the area before continuing to prevent cracking.
Preventing Cracks and Chips in a Glass Bowl
Always support the bowl from below. The curved bottom concentrates pressure in one point. A padded surface spreads weight more evenly.
Avoid drilling too close to the edge. Rim areas are thin and less supported. Drilling there increases cracking risk immediately.
Do not rotate the bowl while drilling. Movement changes pressure on the bit. Keeping it still ensures smoother drilling.
Check the bowl for existing hairline cracks. Even tiny flaws spread quickly when drilling. Never drill damaged glass for safety.
Drill slowly through the final layer. When the bit exits stress increases at the breakthrough point. Reduce pressure before the last stage.
Finishing and Smoothing the Hole Safely
Once the bit passes through keep the drill moving slowly. Pulling out too fast creates chips around the exit. Controlled movement protects the edges.
Rinse the area to remove glass dust. Leftover particles make sanding uneven. Clean surfaces produce better finishing results.
Use fine grit sandpaper to smooth the edges. Wet sanding reduces dust and protects the glass. Smooth edges make the bowl safe to handle.
Diamond sanding pads work well for thicker bowls. They remove small sharp spots gently. Do not sand aggressively because it weakens the hole.
Check both sides of the hole for hidden cracks. Damage may appear inside even when the outside looks perfect. Fixing early prevents failure during use.
Should I polish the hole after drilling?
Yes polishing removes tiny chips and creates a smoother safer edge.
How long should I wait before using the bowl?
Wait until the hole is completely dry before installing any hardware.
What if the hole looks uneven after drilling?
Light sanding helps improve the shape but deep flaws may require restarting.
Can I widen the hole after finishing?
Widening is risky and should be avoided because it stresses the glass.
Should I clean the inside of the bowl as well?
Yes glass dust settles inside and must be washed out for safety.
Common Mistakes to Avoid While Drilling a Glass Bowl
Using high speed is the fastest way to break the bowl. Speed must stay low from start to finish. Rushing creates heat and pressure instantly.
Forcing the drill instead of grinding creates stress. Let the bit work slowly without pushing. Patience protects the glass from cracking.
Skipping cooling leads to sudden temperature change. Heat builds faster in curved glass than flat tile. Water prevents thermal shock during drilling.
Switching angles while drilling creates vibration. Keeping the drill straight ensures clean and round holes. Angle changes weaken the drilling point.
Finishing too quickly causes chipping at the exit. Slowing down near the breakthrough prevents damage. Clean edges depend on controlled movement.
Conclusion
Drilling a hole in a glass bowl becomes much safer when the right technique is used. Slow speed cooling and light pressure prevent cracking during the process. Preparing the bowl with tape and proper support keeps the surface stable and secure.
Diamond drill bits grind through the glass gradually instead of forcing it. Continuous water flow protects the bowl from heat buildup and stress. Finishing the hole with smooth sanding ensures the edges stay safe and clean.
Avoiding common mistakes such as rushing applying pressure or skipping cooling reduces damage. Patience and careful steps make the process easier even for beginners. With the right approach you can drill a glass bowl successfully without cracks or costly breakage.

I’m John F. Nicholas, the founder, lead writer, and drill enthusiast behind 101drill.com. With years of hands-on experience in power tools and DIY projects, I created this platform to share practical knowledge, expert tips, and real-world insights to help others master the art of drilling.