
Drilling a hole in a metal pipe can feel more challenging than drilling into flat metal because the curved surface does not offer a stable point of contact.
The moment the drill bit touches the round surface, it begins to slide off to the side and scratches the pipe instead of cutting through it. Many beginners face this slipping problem and worry that the bit will never stay in place.
Imagine you need to attach a clamp, pass a wire through the pipe or create a drainage hole for a project.
You mark the exact spot on the pipe where the hole should be, but as soon as you start drilling, the bit wanders away and creates an unwanted mark on the metal. Even a small mistake like this can throw off the alignment and make the final result look unprofessional.
Metal pipes require a special approach because their curved surface needs extra support before the drill can bite into the metal.
Without the right guidance, the drill bit will always slide, chatter or fail to start cleanly. This is why professionals use specific stabilizing techniques to make the drill hold its position.
The key to drilling clean holes in metal pipes is preparing the surface properly and using the right tools.
Once the drill begins cutting into the metal at the correct angle and speed, the rest of the process becomes surprisingly smooth and predictable. The difference between a messy hole and a perfect one usually comes down to small details.
Metal pipes also require careful clamping because they tend to rotate or move under pressure. If the pipe shifts while drilling, the hole may become crooked or oversized. Proper stabilization helps maintain control and improves accuracy.
Once you understand how to guide the bit and prevent slipping, drilling a hole in a metal pipe becomes a simple task.
Whether you are working with thin conduit pipes or thick steel tubes, the correct method always delivers clean and professional results. This guide explains every step you need to follow for safe and accurate pipe drilling.
Why Drilling Metal Pipes Requires Special Technique
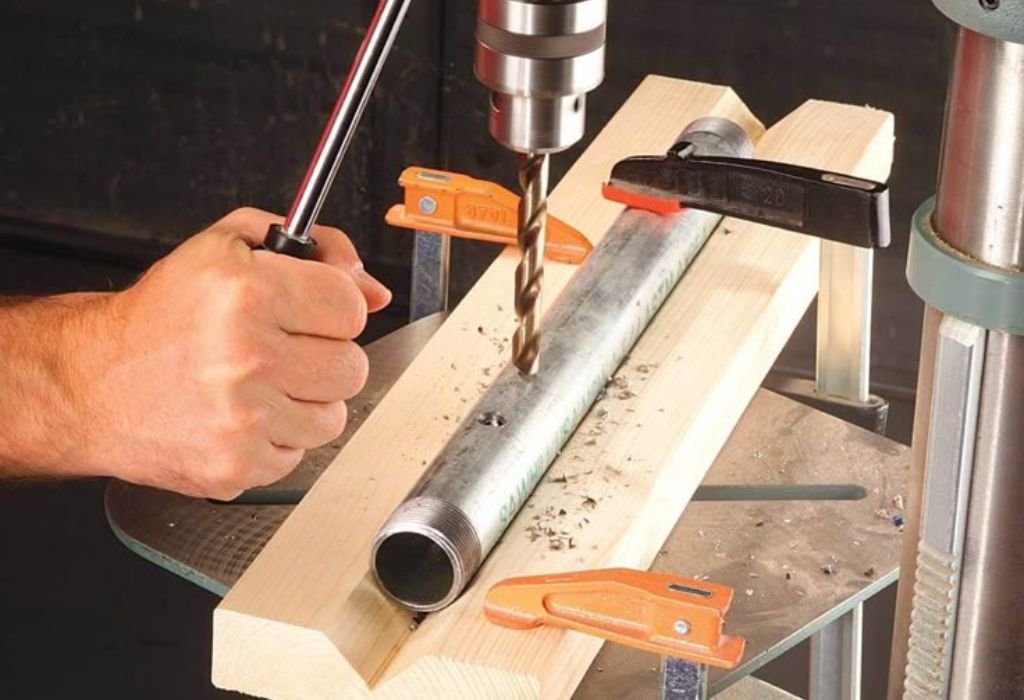
Metal pipes have a curved outer surface that offers very little flat area for the drill bit to grab. When the bit touches the curved surface, only a small point makes contact. This limited contact causes the bit to slide instead of cutting.
Pipes also tend to rotate if not clamped properly. Even slight rotation makes drilling difficult because the drill bit cannot bite into the metal evenly. This movement can also damage the drill bit or scratch the pipe surface.
Metal pipes come in various thicknesses. Thin pipes require gentle drilling to avoid bending or tearing, while thicker pipes need a stronger bite from the drill. Understanding the pipe thickness helps choose the right drilling method.
Heat builds up quickly when drilling metal. Pipes are hollow, so heat dissipates differently compared to solid metal. Too much heat can damage the drill bit or weaken the pipe surface.
Metal pipes sometimes have coatings or finishes that require careful drilling. Coatings can cause additional slipping before the bit reaches bare metal. Proper preparation helps the bit cut through both coating and metal cleanly.
Many pipes are used for structural or plumbing purposes. Incorrect drilling can weaken the pipe or cause leaks. This makes accuracy more important than in flat sheet metal drilling.
Drilling at the wrong angle can create elongated or uneven holes. Metal pipes need steady alignment from start to finish. A guided approach ensures professional results every time.
Tools You Need to Drill a Hole in a Metal Pipe
A power drill with variable speed is essential for drilling metal pipes. Low speed gives better control during the initial bite. High speed should be avoided because it increases slipping.
High speed steel or cobalt drill bits work best for metal pipes. These bits stay sharp longer and handle heat better. Sharp bits are especially important when starting on curved surfaces.
A center punch helps create a starting dent. This dent holds the bit in place during the first few seconds of drilling. Without a punch mark, the bit will slide instantly.
Pipe clamps or V blocks help stabilize round pipes. These tools hold the pipe securely and prevent rotation during drilling. Proper stabilization prevents accidents and improves accuracy.
Cutting oil reduces friction while drilling metal. The oil keeps the drill bit cool and prevents heat damage. Even a small amount of oil improves cutting performance.
Marker tools create visible guides on the pipe. Clear markings show exactly where the hole should be made. Proper marking improves alignment.
Safety gear is important when drilling metal. Safety glasses, gloves and hearing protection keep you safe from metal chips and noise. Metal shavings from pipes can be sharp and unpredictable.
How to Prepare a Metal Pipe Before Drilling
Marking the drilling point is the first step. Using a marker or scribe makes the position easy to see. Proper marking prevents misalignment.
The center punch creates a strong indentation at the marked point. This dent is essential because it stops the drill bit from wandering. The deeper the dent, the more stable the bit will be.
Cleaning the pipe surface removes dust, oil or rust. A clean surface offers better grip for the drill bit. Dirt or oil increases slipping during drilling.
Pipe clamps or V blocks should be used to secure the pipe. Clamping stops the pipe from rotating or rolling. A stable pipe improves drilling control.
Lighting should be bright enough to see the punch mark clearly. Shadows make it harder to drill accurately. Proper lighting improves precision.
Measuring the pipe ensures the hole is placed at the correct location. Incorrect measurements can lead to misaligned fittings. Measuring twice helps avoid mistakes.
Preparing the drill beforehand minimizes interruptions. The bit should be secured tightly and set to a low speed. Proper preparation ensures a smoother drilling process.
How to Start a Clean Hole on a Curved Metal Pipe
Starting the hole is the hardest part because the bit touches only a small curved area. This small contact point causes the bit to slip. A strong punch mark helps prevent this.
The drill should be positioned at a slight angle during the initial bite. This angle helps the bit dig into the metal instead of sliding. Once the bit bites, you can straighten the drill.
Using very low speed helps the bit grab the surface. Slow drilling allows the cutting edges to engage gradually. This increases control and prevents mistakes.
Holding the drill firmly with both hands improves stability. One hand guides the drill while the other stabilizes the body. This reduces wobbling while starting the hole.
Cutting oil should be applied at the starting point. Lubrication reduces slipping and lowers heat. This helps the bit cut smoothly.
Once the bit begins to cut a small groove, the drill can be straightened. The groove keeps the bit in position as drilling continues. This transition must be controlled slowly.
Checking the starting groove ensures the bit is cutting evenly. Uneven grooves indicate slipping or misalignment. Adjusting early prevents larger mistakes later.
Why does the drill bit slide on a metal pipe?
The curved surface gives the bit very little contact, causing it to slip.
How do I stop the bit from wandering?
Use a center punch and start drilling at very low speed.
Is it harder to start a hole on thin pipe?
Yes, thin pipes require lighter pressure to avoid denting.
Can I use a smaller bit to start the hole?
Yes, smaller bits dig into the metal more easily and reduce slipping.
Why does the bit make scratching marks?
Slipping occurs when the punch dent is too shallow or speed is too high.
How to Drill Deeper Into a Metal Pipe Without Cracking It
Deeper drilling requires a steady hand because the bit must maintain alignment throughout the process. Any sudden angle changes can crack thin pipes. Slow and smooth drilling helps avoid this issue.
Cutting oil reduces friction and heat. Heat builds up faster when drilling deeper. Lubrication keeps the bit sharp and effective.
Pulling the drill bit out occasionally removes metal shavings. These shavings can clog the bit and cause resistance. Clearing them improves cutting efficiency.
Maintaining the same speed prevents uneven cutting. Speed fluctuations can cause vibration. Consistent drilling reduces noise and improves control.
Pressure should be gentle rather than forceful. Excess pressure can cause the pipe wall to crack. Let the bit do the cutting instead of pushing hard.
Using sharp bits reduces the strain on both the drill and the pipe. Dull bits require excessive pressure. Sharp bits give smoother and cleaner holes.
Checking progress frequently helps maintain alignment. Pipes can shift slightly even when clamped. Adjusting early ensures accuracy.
Using a Drill Guide or Jig for Perfect Holes in Pipes
A drill guide helps maintain the correct angle and position. Guides keep the drill centered throughout the process. This is useful for beginners who struggle with slipping.
V block guides are specifically designed for round surfaces. The pipe rests inside the V shape, preventing rotation. This stabilizes both the pipe and the drill.
Some guides have adjustable angles. This helps when drilling at non perpendicular angles. Adjustable guides add versatility to metal pipe projects.
Using a guide minimizes human error. Even experienced users benefit from the stability a guide offers. Consistent tools create consistent results.
The guide also reduces wrist strain. Holding a drill steady on a curved surface requires effort. The guide supports the drill body and reduces fatigue.
Cutting oil should still be used even with a guide. Guides ensure stability but do not reduce friction. Lubrication ensures smoother cutting.
Checking alignment before drilling prevents mistakes. Guides must be positioned correctly to ensure accuracy. A small adjustment before drilling avoids crooked holes.
Do I need a drill guide for metal pipes?
A guide is very helpful but not absolutely required for small holes.
Can I make my own pipe drilling jig?
Yes, wooden blocks and V block shapes work well as homemade guides.
Do drill guides prevent slipping?
Yes, guides improve stability and reduce bit wandering.
Can I use a guide for thick steel pipes?
Yes, guides work well on both thin and thick pipes.
Should I clamp the guide as well?
Yes, clamping prevents movement and improves accuracy.
Avoiding Common Mistakes When Drilling Metal Pipes
One common mistake is not using a center punch. Without a dent, the bit slides instantly. This makes starting the hole almost impossible.
Another mistake is drilling at high speed. High speed increases slipping and heat. Low speed gives better control.
Using dull bits is another problem. Dull bits require more force and cause rough holes. Sharp bits give cleaner results.
Not clamping the pipe properly leads to dangerous movement. Metal pipes can rotate unexpectedly. This movement can damage tools and create unsafe conditions.
Applying too much pressure can deform thin pipes. Gentle pressure works best for metal pipe drilling. Excess force increases the risk of cracking.
Skipping lubrication increases friction. Friction damages the drill bit and the pipe surface. Cutting oil is necessary for smooth drilling.
Incorrect angle alignment can cause oval shaped holes. Proper positioning ensures round and clean holes. Checking alignment early prevents problems.
Safety Tips for Drilling Holes in Metal Pipes
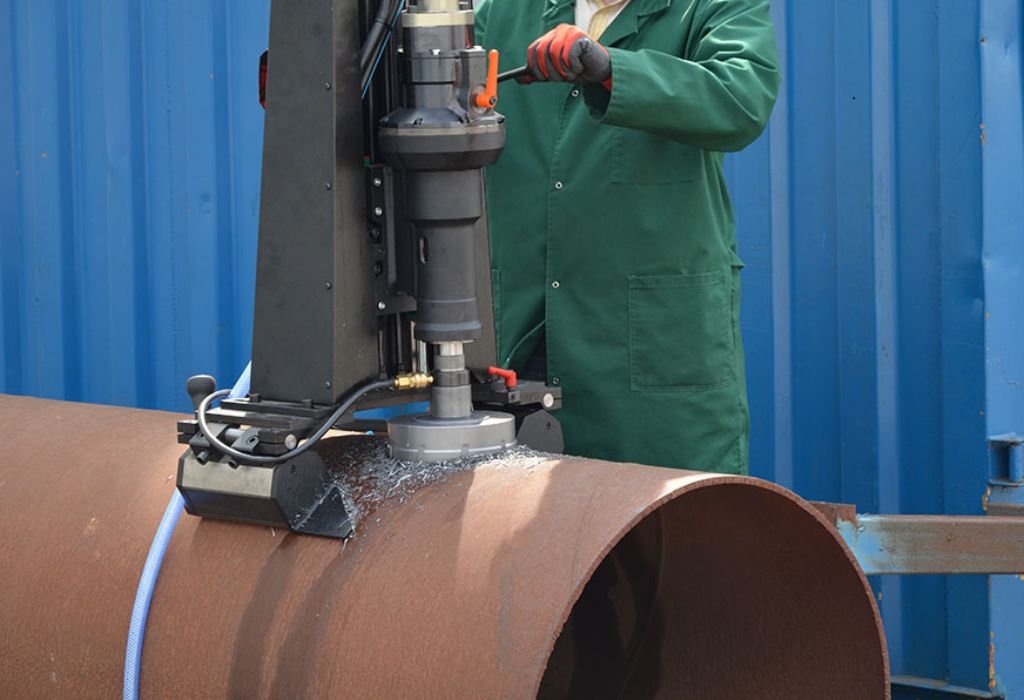
Safety glasses protect your eyes from metal chips. Drilling curved surfaces can send chips in unpredictable directions. Proper eye protection prevents injury.
Tight gloves protect your hands from metal shavings. Loose gloves can get caught in the drill. Wearing fitted gloves ensures safety.
Clamping the pipe is crucial. Unclamped pipes can slip or roll during drilling. This movement can cause serious accidents.
Avoid wearing loose clothing while drilling. Loose fabric can get tangled in the drill. Proper clothing reduces risks.
The drill bit becomes extremely hot during cutting. Touching it too soon can cause burns. Allow the bit to cool naturally.
Cutting oil helps reduce heat and friction. Less heat improves safety. Lubrication protects both the drill bit and the pipe.
A stable working area improves overall safety. A clean, bright workspace helps maintain accuracy and reduces hazards. Good organization prevents accidents.
Do I need eye protection when drilling pipes?
Yes, metal chips can fly unpredictably due to the curved surface.
Should I wear gloves?
Wear tight gloves to avoid contact with hot shavings.
Is clamping the pipe necessary?
Yes, clamping prevents rotation and improves safety.
Why is the drill bit hot after drilling?
Friction during metal drilling generates heat.
Is cutting oil required for safety?
Yes, lubrication helps prevent overheating and tool damage.
Finishing and Cleaning the Hole After Drilling
Deburring the hole removes sharp metal edges. A deburring tool or file smooths the opening. This improves safety and appearance.
Cleaning the inside and outside of the hole removes metal shavings. These shavings can damage tools or cause injury. A clean hole looks more professional.
Testing the hole with the required bolt or fitting ensures proper sizing. Metal pipes often require precise hole sizes. Testing prevents installation issues.
Polishing the entry area improves the finish. Smooth surfaces make it easier to insert screws or connectors. Polishing enhances the final look.
Checking alignment ensures the hole is centered and straight. Misaligned holes can affect how parts fit together. Proper inspection prevents future problems.
Removing any remaining burrs ensures clean edges. Burrs can cause scratches or injuries. Smoothing them completes the finishing process.
Preparing the pipe for its intended purpose ensures the best performance. A clean, smooth and accurate hole supports proper installation. This marks the successful completion of the drilling task.
Conclusion
Drilling a hole in a metal pipe becomes much easier once you follow the right steps. Proper marking, slow drilling and using a center punch help prevent slipping. These small details create a big difference in accuracy.
Using cutting oil, sharp bits and proper clamping ensures smooth drilling. Avoiding common mistakes like drilling too fast or applying excessive pressure protects both the pipe and the drill bit. These techniques make the process safer and more controlled.
Metal pipes require extra care because their curved surfaces can shift or slip under the drill. With patience and the correct method, anyone can drill clean holes in metal pipes confidently. A careful approach guarantees strong, smooth and professional results.

I’m John F. Nicholas, the founder, lead writer, and drill enthusiast behind 101drill.com. With years of hands-on experience in power tools and DIY projects, I created this platform to share practical knowledge, expert tips, and real-world insights to help others master the art of drilling.