
Drilling a clean countersink hole in metal seems simple until someone tries it and ends up with chatter marks, scratches or uneven edges. This happens because countersinking requires controlling the angle, pressure and speed with much more precision than basic drilling.
When the screw head must sit flush for strength or appearance, even small mistakes can ruin the finished piece.
Many beginners think the solution is to press harder or drill faster, but metal does not respond well to rushed cutting. A proper countersink hole depends on the exact bit angle, correct rpm range and steady feed pressure. Without these factors working together, the hole becomes rough and the screw does not seat correctly.
Countersink holes are used in automotive repair, machinery assembly, metal fabrication and many DIY projects.
They allow flat head screws to sit level with the surface, preventing snagging, vibration and misalignment. This makes countersinking an essential technique for building clean and durable metal structures.
Choosing the right countersink bit is one of the most important steps in the process. Each fastener requires a specific angle, and using the wrong one creates loose seating or uneven contact. A properly matched bit ensures the screw blends perfectly with the metal surface.
Preparation also plays a huge role in achieving clean results. Cleaning the metal, marking the exact center point and clamping the material firmly all help maintain control during drilling. Without these steps, the bit may chatter or wander and damage the metal surface.
This guide explains the full process of drilling perfect countersink holes in metal using simple and effective techniques.
You will learn about tools, setup, speed control, lubrication methods and step by step drilling procedures. By the end, you will be able to make smooth countersink holes that look professional and perform reliably.
What Is a Countersink Hole in Metal
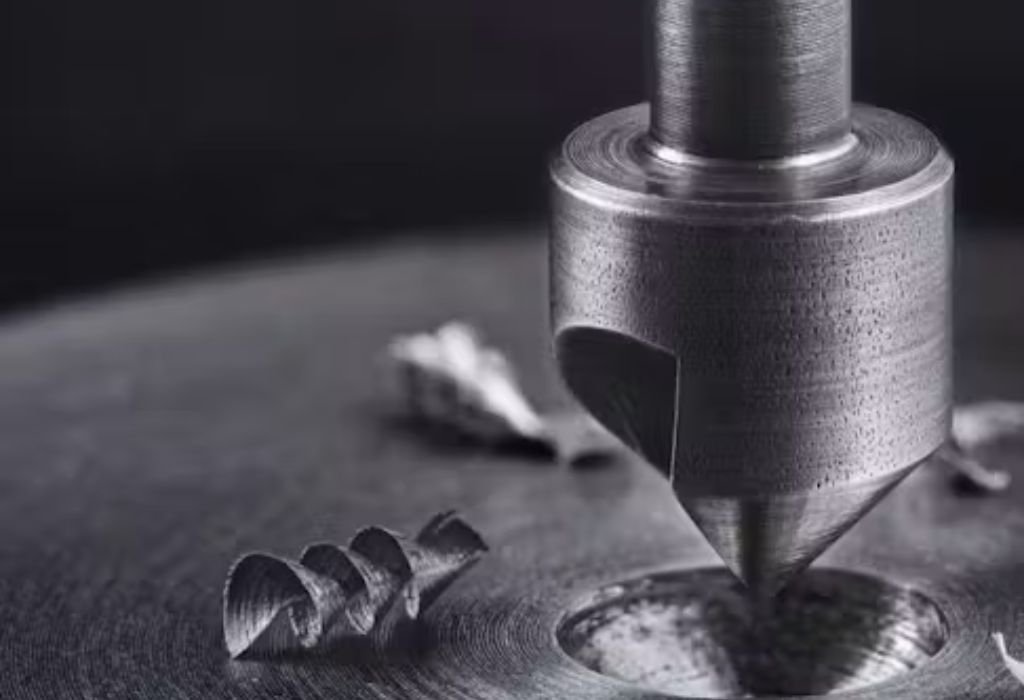
A countersink hole is a conical shaped opening at the top of a drilled hole that allows a flat head screw to sit flush with the metal surface.
The angled cut matches the screw head perfectly so the fastener becomes level with the surrounding material. This helps improve appearance and prevents snagging on the exposed screw.
Countersink holes differ from counterbore holes, which create a flat bottomed cylindrical recess. While counterbores are used for socket head screws, countersinks are specifically for flat or oval head screws. Understanding this difference helps you choose the correct tool for each job.
The angle of a countersink hole is one of the most important features. Common angles include 82 degrees, 90 degrees and 100 degrees depending on the screw design. Using the correct angle ensures proper contact and secure seating.
Countersinking helps distribute load evenly across the screw head. This improves structural strength and reduces the risk of the screw loosening under vibration. Properly seated screws also increase durability in long term use.
These holes also improve the visual finish of metal projects. A flush screw head provides a clean professional appearance. This is especially important in visible assemblies or decorative metalwork.
Countersink holes are essential in many industries including automotive, construction, electronics and manufacturing. Their function is both structural and aesthetic. Knowing how to create these holes correctly makes your metalwork stronger and more attractive.
Why Countersink Holes Are Used in Metalworking
Countersink holes allow flat head screws to sit level with the surface of the metal. This prevents the screw from sticking out and causing snagging or interference. In moving parts, it also reduces friction and improves functionality.
Flush screw seating improves the appearance of metal assemblies. Cleanly seated screws create a smooth surface that looks precise and intentional. This is important for high quality work or visible components.
Countersink holes improve structural performance because the screw head makes full angled contact. This increases frictional hold and strengthens the joint. Without a countersink, the screw might sit unevenly and lose its grip.
In machine building, countersink holes keep the fastener from catching on nearby components. This prevents damage during movement or vibration. Smooth surfaces help maintain long term reliability.
Metalworkers also use countersinks to remove burrs or sharp edges around drilled holes. The angled cutting action smooths the opening. This reduces risk of injury and improves overall finish quality.
The process also reduces stress concentrations in the metal. Sharp edges or uneven surfaces create weak points under load. Countersinking removes these risks and strengthens the connection area.
Tools Needed to Drill Countersink Holes in Metal
Countersink bits are the most important tools for drilling angled recesses. These bits create a clean conical cut that fits the screw head shape. They come in various angles and sizes for different applications.
A drill press is ideal for drilling accurate countersinks. It keeps the bit at a consistent angle and reduces wobbling. Hand drills can be used but require more skill to stay steady.
Chamfer tools can refine or enlarge existing countersinks. They remove small high spots and smooth rough edges. These tools help achieve a polished finish.
Deburring tools are essential for removing sharp edges around drilled holes. Even after countersinking, small burrs may remain. Removing them improves appearance and reduces risk of cuts.
Cutting oil is necessary for cooling and lubrication. Countersinking generates heat quickly, especially in tougher metals. Lubrication keeps the bit sharp and the surface smooth.
Accurate measuring tools help confirm depth and angle. Depth gauges and calipers allow precise control. This ensures that screws seat properly without overcutting.
Choosing the Right Countersink Bit
Selecting the correct countersink angle is one of the most important steps. Different screws are designed for specific angles that match their head shape. Using the wrong angle reduces surface contact and weakens the joint.
High speed steel countersink bits are affordable and effective for most metals. They offer good durability and clean cutting performance. These bits work well for general fabrication tasks.
Carbide countersink bits are stronger and more heat resistant. They remain sharp longer and are ideal for stainless steel or hardened materials. Carbide bits produce cleaner finishes with less chatter.
Multi flute countersink bits provide smoother cutting action. Multiple flutes reduce vibration and leave fewer marks. These bits are preferred for high quality finishing.
Single flute countersink bits offer better control in thin sheet metal. They produce cleaner cuts without grabbing. This prevents distortion in delicate workpieces.
Choose a bit size that matches your screw diameter. The countersink must be wide enough for the head to sit flush. Too small or too wide creates weak or unattractive connections.
Preparing the Metal Surface Before Drilling
Begin by cleaning the metal surface thoroughly. Dirt, oil or rust can cause the bit to slip and affect accuracy. Clean surfaces improve every stage of countersinking.
Mark the center of the hole clearly using a scribe or marker. Accurate marking helps guide the drill bit and maintains alignment. This prevents off center countersinks.
Use a center punch to create a small indentation at the marked point. This indentation prevents the drill from wandering during cutting. A clean punch mark enhances accuracy.
Clamp the metal securely to a stable surface. Movement during drilling creates chatter marks and uneven angles. Good clamping ensures a clean and controlled cut.
Choose an appropriate pilot hole size based on screw diameter. Countersinks are always formed after drilling the pilot hole. Matching hole size improves screw fitment.
Apply cutting oil before drilling and countersinking. Lubrication reduces heat and friction during the process. This helps protect both the bit and the workpiece.
Step by Step: How to Drill Countersink Holes in Metal
Start by drilling the pilot hole using the correct bit size. The pilot hole determines the screw diameter and guides the countersink. Drill the hole straight and clean before beginning the angled cut.
Insert the countersink bit into the drill or drill press. Align it directly above the center of the pilot hole. A centered approach ensures the countersink forms evenly around the hole.
Begin drilling at a low rpm. Low speed reduces chatter and improves cutting control. High speed causes burning and rough cutting in metal.
Apply cutting oil to the countersink bit during drilling. Oil cools the bit and improves surface smoothness. Proper lubrication extends tool life and enhances finish quality.
Feed the bit gently while forming the angled recess. Light pressure prevents overshooting the correct depth. Heavy pressure digs too deeply and damages the metal.
Stop frequently to check the depth. The screw head should sit flush or slightly below the surface. Checking depth avoids overcutting and maintains precision.
How to Use a Drill Press for Countersinking
Set the drill press to a low speed appropriate for metal. High speeds cause vibration and reduce finish quality. Low controlled rpm ensures smooth cutting.
Position the metal securely under the bit and clamp it firmly. Movement during drilling causes uneven surface cuts. Clamping improves accuracy and safety.
Lower the countersink bit slowly to begin cutting. Steady motion prevents chatter and produces a clean angled surface. Jerky movements cause gouges and uneven cuts.
Use light feed pressure during countersinking. Soft steady pressure helps maintain consistent cutting depth. Heavy force may cause the bit to bite too aggressively.
Apply cutting oil frequently to prevent overheating. This ensures the bit stays sharp and the surface remains smooth. A cool cutting environment always produces better results.
Use the drill press depth stop to control final depth. Depth stops prevent accidental overdrilling. This ensures the screw head seats perfectly every time.
Using Hand Drills for Countersink Holes
Hold the drill firmly to maintain stability during cutting. Hand drills can wobble more easily than drill presses. A steady grip improves accuracy.
Start countersinking at the lowest possible speed. Slow speed prevents the bit from grabbing the metal. High speed creates chatter and rough texture.
Apply gentle pressure while forming the recess. Too much pressure causes the bit to dig suddenly. Light pressure allows controlled and smooth cutting.
Use both hands if possible to steady the drill. This reduces side to side movement and keeps the recess symmetrical. Stability improves the overall quality of the countersink.
Add cutting oil every few seconds to maintain cooling. Hand drilling generates heat quickly at the tip. Lubrication reduces friction and prevents burning.
Stop drilling often to inspect your progress. Hand drills make it easy to overshoot the correct depth. Frequent checking maintains accuracy.
Correct RPM and Feed Rate for Countersinking
Different metals require different rpm settings for best results. Hard metals need slower speeds to reduce heat. Soft metals tolerate moderate speed increases.
Feed rate must be gentle and controlled. Excessive pressure increases tool wear and damages the workpiece. Light and steady pressure maintains a clean cut.
Cutting oil should be applied frequently during fast operations. Lubrication prevents burning and prolongs tool life. Smooth cutting reduces chatter marks.
Avoid running the countersink bit at high rpm. High rpm causes vibration and rough surfaces in the recess. Lower speeds ensure better finish quality.
Check the manufacturer recommendations for more accurate rpm ranges. Many countersink bits include speed guidelines. Following these recommendations improves results.
Pause occasionally during deep cutting operations. This allows the bit to cool and prevents overheating. Controlled drilling always leads to cleaner results.
Common Mistakes When Drilling Countersink Holes
Using the wrong countersink angle is one of the most common mistakes. Incorrect angles cause poor screw seating. Matching the angle ensures optimal performance.
Drilling too quickly leads to rough surfaces. High speed cuts unevenly and increases chatter. Low speeds allow smooth controlled cutting.
Forgetting to use cutting oil causes burning. Dry drilling in metal increases friction and damages the bit. Lubrication is essential for quality countersinking.
Failing to secure the metal properly causes movement. Movement during drilling results in uneven angled cuts. Proper clamping ensures consistency.
Applying too much feed pressure damages the surface. Heavy pressure forces the bit deeper than intended. Gentle pressure maintains accurate depth.
Overcutting the countersink creates a weak connection. Too deep recesses reduce screw holding strength. Frequent depth checking prevents errors.
How to Inspect Countersink Holes for Accuracy
Use a flat head screw to test fit the recess. The screw head should sit flush or slightly below the surface. A raised or recessed screw head indicates incorrect depth.
Check the angle visually or with a measuring tool. Smooth even angles reflect light uniformly. Uneven reflections indicate irregular cutting.
Inspect the interior surface for chatter marks. Chatter marks appear as small ridges inside the recess. These indicate incorrect feed pressure or speed.
Use a caliper to measure the top diameter of the countersink. Accurate diameter ensures proper screw seating. Too wide or too narrow impacts stability.
Check the edge of the countersink for burrs. Burrs interfere with screw seating and appearance. Removing them improves the finished look.
Shine a flashlight inside the recess to spot imperfections. Light reveals scratches and uneven surfaces. Adjustments may be needed for cleaner finish.
Best Metals for Countersinking
Mild steel is easy to countersink and produces clean finishes. It responds well to most bit types. This makes it suitable for beginners.
Aluminum cuts smoothly with countersink bits. It is soft enough for fast cutting but requires careful chip removal. Too much speed may cause melting or clogging.
Stainless steel requires slow speeds and lubrication. Its hardness makes countersinking more challenging. Proper cooling prevents burning and dulling.
Brass cuts cleanly and forms extremely smooth recesses. It produces minimal burrs and offers excellent control. Many professionals prefer brass for precision work.
Cast iron breaks into fine powder like chips. This reduces clogging and improves cutting flow. However, its brittleness requires careful handling.
Thin sheet metal requires single flute countersink bits. Multi flute bits may grab and distort thin material. Light pressure helps maintain clean shapes.
Recommended Tools and Brands for Countersink Holes
Irwin countersink bits provide reliable cutting performance. They produce clean angled recesses in most metals. Many metalworkers trust Irwin for general fabrication.
DeWalt countersink bits offer durability and smooth cutting. Their flute design reduces chatter on tough metals. They are ideal for consistent performance.
Amana carbide countersink bits excel in stainless steel. They maintain sharpness longer and cut cleanly. They are preferred for heavy duty tasks.
WEN drill presses provide stability and adjustable speed. These features improve accuracy during countersinking. Proper control enhances final finish.
Tap Magic cutting oil improves lubrication during drilling. It reduces friction and prevents burning. Using quality oil protects your bits and extends their life.
Vise grips from Yost or Wilton secure metal tightly. Strong clamping prevents movement during countersinking. This improves accuracy and safety.
Troubleshooting Poor Countersink Holes
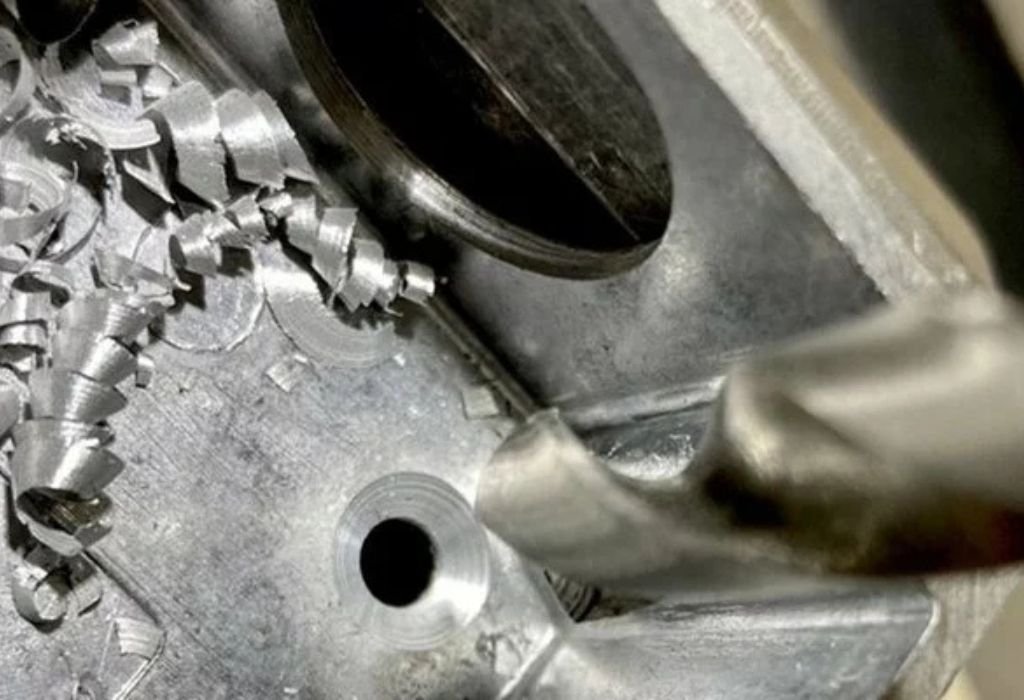
If the recess is rough, lower your rpm and apply more lubrication. Rough surfaces indicate excessive speed or insufficient oil. Slower controlled cutting improves texture.
If the countersink is too deep, you may need to fill and redrill. Overcutting reduces screw holding strength. Careful depth checking prevents this issue.
If chatter marks appear, reduce feed pressure. Chatter comes from vibration or improper speed. A steady hand and slower rpm eliminate these marks.
If the screw does not seat flush, check the angle. Incorrect angle selection prevents proper seating. Switching to the correct angle fixes the issue.
If burrs remain, use a deburring tool to clean the edges. Burrs cause poor screw seating and safety concerns. Deburring produces a smooth finish.
If the hole is off center, recheck your center punch accuracy. Misaligned punch marks cause uneven cutting. Proper preparation ensures centered countersinks.
Essential FAQ on Creating Countersink Holes in Metal
What is the correct angle for a metal countersink hole?
The correct angle depends on the screw design, with common angles being 82 degrees, 90 degrees or 100 degrees. Matching the angle ensures full seating contact. Using the wrong angle weakens the screw fit.
Can I drill a countersink hole without a drill press?
Yes, you can use a hand drill, but you must keep it steady and use low speed. Drill presses give better accuracy and reduce chatter. Hand drills require extra control to maintain clean cuts.
Do I need a pilot hole before drilling a countersink?
Yes, the pilot hole guides the countersink bit and determines the screw diameter. A clean pilot hole ensures proper alignment. Skipping it often causes uneven seating.
Why does my countersink hole have chatter marks?
Chatter marks come from vibration or using high rpm. Low speed and steady pressure remove chatter. Proper lubrication also prevents rough cutting.
Can I use a countersink bit on stainless steel?
Yes, but stainless steel requires slower rpm and cutting oil. Carbide bits work best for tough metals. High speed steel bits may dull quickly.
How do I know when the countersink is deep enough?
Test the hole with the actual flat head screw. The screw should sit flush or slightly below the surface. Checking depth regularly prevents overcutting.
Why is my countersink hole uneven or off center?
This usually happens when the metal is not clamped tightly. Movement during drilling shifts the cutting angle. A good center punch also helps maintain alignment.
Do I need lubrication for countersinking metal?
Yes, lubrication reduces friction and prevents overheating. Cutting oil protects the bit and improves finish quality. Dry drilling leaves rough surfaces.
What rpm should I use for countersinking metal?
Low rpm is best for all metals because it prevents chatter and burning. Hard metals require even slower speeds. High rpm ruins the finish and damages the bit.
Can I fix a countersink hole that is cut too deep?
If the hole is slightly deep, you can sometimes use a washer to correct seating. If it is too deep, fill the hole and redrill. Preventing overcutting is easier than repairing it.
Conclusion
Drilling clean countersink holes in metal requires the right bit, proper angle selection, slow speed and steady pressure.
When these elements are combined correctly, the recess becomes smooth and precise. A well cut countersink improves both the appearance and strength of the screw connection.
Countersinking is essential in fabrication, automotive work and machinery assembly. Flush screw seating reduces interference and increases durability. Using correct methods ensures long lasting and reliable results.
By following the steps in this guide, you can confidently create professional quality countersink holes in any metal project. Careful preparation, proper tooling and controlled drilling always produce the best outcomes.

I’m John F. Nicholas, the founder, lead writer, and drill enthusiast behind 101drill.com. With years of hands-on experience in power tools and DIY projects, I created this platform to share practical knowledge, expert tips, and real-world insights to help others master the art of drilling.