
Most people feel a little nervous the first time they try to drill a hole in metal because the drill bit does not bite into the surface right away.
The moment the bit begins to wander, the sound becomes sharper and the metal starts to scratch in the wrong direction. This creates frustration because even a tiny slip can ruin both the appearance and accuracy of the work.
Imagine you need to attach a small bracket to a metal surface and every measurement is perfectly aligned.
You place the drill on the exact spot, press the trigger and suddenly the bit slides away as if the metal is pushing it aside. A single mistake like this can turn a clean job into something that looks rough and uneven.
This situation is very common among beginners who do not know what a pilot hole really does. A pilot hole makes it easier for the drill bit to stay stable, dig into the surface and create a precise path for the final hole.
The moment the pilot hole is done correctly, the bigger drill bit follows the path smoothly without slipping.
Metal is strong, tough and very different from wood or plastic, so drilling without preparation can lead to damaged bits or overheated metal.
That is why professionals always treat the pilot hole as the foundation of accurate drilling. Once the pilot hole is clean, straight and properly made, the rest of the drilling becomes much easier.
The technique to drill a perfect pilot hole is not complicated, but it requires patience and the right steps. Anyone can learn it with a little practice and attention to detail. This guide explains everything you need to do from marking the metal to finishing the hole safely.
Why Pilot Holes Matter When Drilling Metal
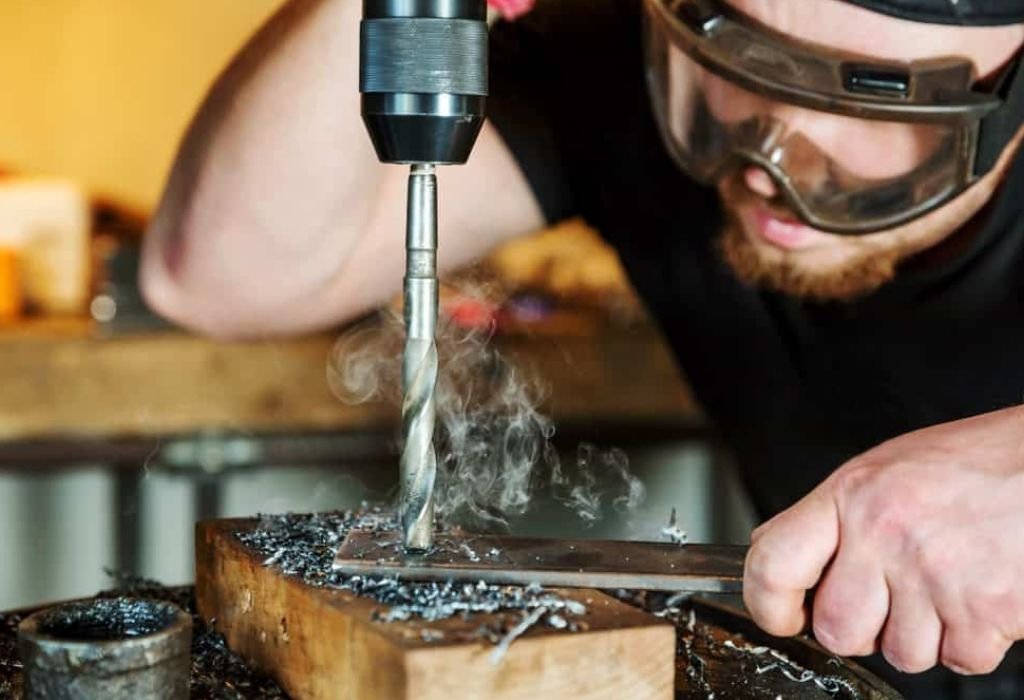
A pilot hole plays a critical role because metal surfaces are harder and more slippery than materials like wood. The initial drill bit often struggles to grip the metal, causing it to drift away from the target mark. A pilot hole prevents this movement and helps the bit enter the metal safely.
Pilot holes also reduce the overall resistance the drill experiences during drilling. Without this small hole, the bit is forced to cut through the full thickness of metal right away. This increases friction and causes the bit to overheat.
Another important factor is accuracy because metal does not allow easy correction once a hole is misaligned. A pilot hole guides the larger bit into the exact center. This eliminates mistakes and ensures perfect alignment.
Drilling metal generates a lot of heat and that heat can weaken the drill bit. By starting with a pilot hole, the bit does not have to work as hard and stays cooler for longer. This helps the tool last longer and prevents burning marks on the metal.
Pilot holes also create cleaner final holes that look more professional. When the larger bit follows the pilot hole, the edges become smoother. This helps prevent metal burrs that can cut fingers or catch on fasteners.
The pilot hole technique becomes even more important when working with thicker metal. Thick metal needs more control so the bit does not snap or jam under pressure. A pilot hole ensures steady entry and consistent progress.
People who skip pilot holes often end up damaging both the metal and the tool. Once they learn how pilot holes improve accuracy and safety, they never go back to drilling without one. This simple step saves time, effort and frustration.
Tools You Need to Drill a Pilot Hole in Metal
Using the right tools makes drilling easier and safer because metal requires stronger equipment. A good power drill is the first tool you need because it must have adjustable speed for better control. Corded drills offer steady power while cordless drills provide flexibility.
High speed steel drill bits are suitable for most metal drilling tasks because they are strong and sharp. Cobalt drill bits are even better for harder metals because they stay sharp longer. Titanium coated bits offer good heat resistance for smoother drilling.
A center punch is essential because it creates a small dent in the metal to prevent the drill bit from sliding. The punch mark acts as a guide and helps the bit stay in one place. Every clean and accurate hole begins with a solid center punch.
Cutting oil or lubricant is also important because drilling metal generates heat. Lubricant reduces friction and cooling prevents the drill bit from dulling quickly. A small amount is enough to make drilling smoother.
Clamps are necessary because metal must stay completely still during drilling. If the metal moves, the hole will be inaccurate and the bit might break. A secure workpiece improves safety and results.
Safety gear should never be ignored when drilling metal. Safety glasses, gloves and protective clothing keep you safe from hot metal chips. Hearing protection is also useful when drilling thicker metal.
Measuring tools help you find the exact spot for drilling. A ruler, square or marker ensures perfect alignment before drilling starts. Accuracy in measurement makes the whole project look more professional.
Choosing the Right Drill Bit for Pilot Holes in Metal
Using the correct drill bit is one of the most important steps in drilling a pilot hole in metal. Metal requires harder bits that do not dull easily under heavy pressure and heat. High speed steel bits work for softer metals while cobalt bits are ideal for harder ones.
The size of the pilot hole matters because it must be smaller than the final hole. A typical pilot hole is about half the diameter of the final bit. This gives the larger bit a clear path to follow.
Drill bits with coatings like titanium or black oxide offer better heat resistance. Heat is a major issue when drilling metal and coated bits stay sharper for longer periods. This helps create smoother holes with less effort.
Sharpness is another important factor because dull bits struggle to cut metal. A sharp bit digs in quickly and reduces the need for excessive pressure. This increases control and accuracy during drilling.
The length of the bit also matters because deeper holes require longer bits. Short bits are more stable but may not reach deeper surfaces. Choosing the right length ensures safe and efficient drilling.
The rotation speed affects how well the bit cuts metal. Slower speeds work better for hard metals because they reduce heat. Faster speeds are more suitable for thin or soft metal.
The hardness of the metal must also be considered when choosing a bit. Stainless steel requires stronger bits than aluminum or copper. Knowing the metal type ensures you pick the most effective drill bit.
What drill bit is best for drilling metal?
High speed steel and cobalt bits are best because they handle heat and pressure effectively.
Should the pilot hole be smaller than the final hole?
Yes, the pilot hole must always be smaller so it can guide the larger bit correctly.
Can I use wood drill bits on metal?
Wood bits are not suitable because they are not designed to cut through hard surfaces.
Why is my drill bit smoking while drilling metal?
This usually happens because of high speed, lack of lubrication or using a dull bit.
How do I know if my drill bit is sharp enough?
A sharp bit cuts into metal quickly without slipping or creating excessive heat.
Marking and Preparing the Drilling Spot
Accurate marking ensures the pilot hole is drilled in the exact position needed. A simple pencil or marker works fine for soft metals while harder metals may require a scribe. This mark becomes the guide for the center punch.
The center punch is tapped with a hammer to create a small dent in the metal. This dent keeps the drill bit from wandering when you begin drilling. A stronger tap creates a deeper guide point.
Stabilizing the metal before drilling prevents movement. Movement during drilling can cause misalignment or damage to the bit. A clamp keeps the metal secure and flat on the work surface.
Lighting is important because drilling requires precise vision. A bright work area helps you see the marked spot clearly. Shadows can cause mistakes or poor angle alignment.
Cleaning the metal surface improves drilling results. Dust, oil or debris can cause slipping and uneven drilling. A clean surface ensures proper grip and better performance.
Measuring distances ensures the hole is positioned correctly. Incorrect measurements can lead to misaligned parts or unstable assemblies. This step is especially important for metal brackets or machinery.
Checking your tools before starting also helps avoid delays. Make sure the drill bit is tight in the chuck and the drill speed is set correctly. Proper preparation leads to a smoother drilling experience.
How to Use a Center Punch Before Drilling
Using a center punch helps guide the drill bit into the metal. The punch creates a starting point that prevents the bit from sliding across the surface. This step is simple but very important.
The angle of the punch should be straight and controlled. Holding it at the wrong angle can produce a crooked dent. A vertical position gives the cleanest and deepest mark.
A gentle hammer tap is enough for soft metals. Hard metals may need a slightly stronger hit to form a visible dent. Too much force can crack thin metal.
The punch mark should be centered on the measurement line. An off-center mark leads to a crooked hole. Double checking the location ensures better accuracy.
Some center punches are automatic and do not need a hammer. These tools create dents with spring pressure. Automatic punches work well for fast projects.
Deeper dents are helpful for larger drill bits. The deeper the dent, the easier it is for the bit to stay stable. This reduces the chance of slipping.
Punching should always be done before clamping the metal. Clamping prevents vibration but can restrict proper punching force. Preparing the dent first gives better results.
Why do I need a center punch for drilling metal?
It keeps the drill bit steady and prevents unwanted movement.
Can I drill metal without punching it first?
Yes, but the drill bit will likely slip and damage the surface.
How deep should the punch mark be?
It should be deep enough to hold the drill bit tip in place.
Do automatic center punches work well on metal?
Yes, they are effective and convenient for most metal types.
Can a nail be used instead of a center punch?
A nail can work in an emergency but will not create a precise dent.
Step by Step: How to Drill a Pilot Hole in Metal
Drilling a pilot hole starts with placing the drill bit exactly into the punch mark. This keeps the bit centered and prevents movement. Once positioned, the drill can begin at a slow speed.
The drill should be held straight and steady. Leaning the drill creates uneven pressure that can cause the bit to break. A stable hand makes a cleaner hole.
Starting with low speed allows the bit to cut gently into the metal. High speed generates heat that can damage the bit. Slow drilling gives more control.
Applying cutting oil helps reduce heat buildup. A small drop is enough for smooth performance. Lubrication also extends the life of the drill bit.
Pressure should be consistent but not excessive. Too much force can snap the bit or jam it in the metal. Light and steady pressure is the safest method.
Checking progress frequently ensures the hole stays straight. Pulling the bit out helps remove metal shavings. This keeps the hole clean and improves cutting ability.
Stopping the drill once the pilot hole reaches the desired depth is important. Going too deep may weaken the metal. A properly sized pilot hole guides the next drill bit perfectly.
Avoiding Common Mistakes While Drilling Metal
One common mistake is using the wrong drill bit for the metal type. Using a soft bit on hard metal can cause the bit to wear out quickly. Choosing a strong bit prevents unnecessary difficulty.
Another mistake is drilling without lubrication. Lack of oil increases heat and friction. This can damage both the bit and the metal.
Some beginners push too hard while drilling. Excess pressure causes the bit to jam or snap. Gentle pressure leads to better accuracy.
Drilling at the wrong speed can create sparks or burning smells. Hard metal requires slower speed while thin metal can handle faster drilling. Adjusting the speed improves performance.
Not clamping the metal is another frequent error. A loose workpiece can slip and cause injury. Clamping keeps everything stable during drilling.
Failing to clean away metal shavings makes the hole rough. Removing shavings helps the drill cut smoothly. Clean work areas prevent mistakes.
Ignoring the punch mark can cause the drill to wander. The punch mark is essential for stability. Using it properly keeps the hole perfectly aligned.
Why does my drill bit keep slipping on metal?
Slipping happens when the metal was not punched properly before drilling.
Why does the drill bit break while drilling metal?
This often happens due to excessive pressure or drilling too fast.
How do I avoid scratching the metal surface?
Use a punch and secure the metal with clamps for better stability.
Why is my drill bit making loud squeaking sounds?
This usually indicates the need for cutting oil or a slower drill speed.
Why does my hole look rough and uneven?
Skipping the pilot hole or using a dull bit can cause rough edges.
Safety Tips You Must Follow When Drilling Metal
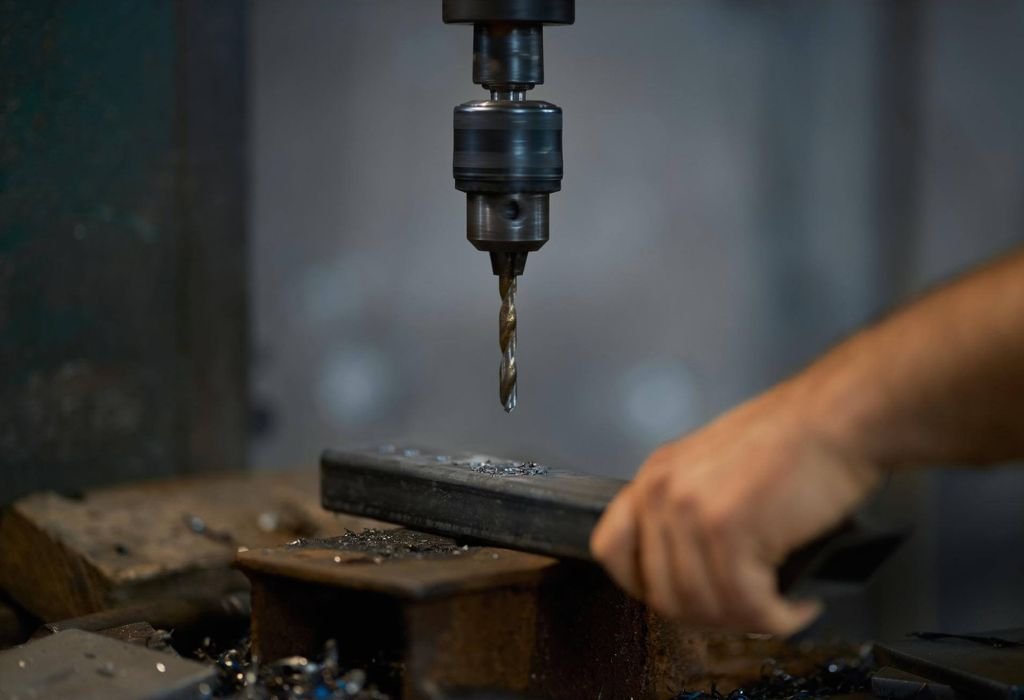
Safety glasses should always be worn when drilling metal. Metal shavings can fly in unpredictable directions. Protecting your eyes prevents serious injuries.
Gloves must be used carefully because loose gloves can get caught in the drill. Tight fitting gloves offer protection without risk. This helps prevent cuts and burns.
Clamping the metal is essential for safety. Moving metal can cause the bit to slip or break. A stable surface keeps you under control.
Loose clothing should be avoided while drilling. Clothing can get caught in the rotating drill. Wearing fitted clothes reduces risk.
The drill should always be held firmly with two hands. This provides balance and strength. A firm grip reduces vibration and improves accuracy.
The area around the drill should stay clean and clear. Clutter can cause accidents or poor footing. A clean workspace improves safety.
The drill bit becomes hot during drilling. Touching the bit immediately after drilling can cause burns. Waiting for it to cool prevents injury.
Finishing, Cleaning and Deburring the Pilot Hole
Deburring removes sharp metal edges around the hole. A deburring tool or file can smooth the rough edges. This makes the hole safer to touch.
Cleaning the area around the hole removes metal shavings. These shavings can damage tools or scratch surfaces. A brush or cloth helps remove debris.
Checking the pilot hole ensures that it is centered and straight. Slight alignment issues can be corrected before drilling the final hole. This step improves accuracy.
Polishing the hole helps screws or bolts fit better. A smooth surface reduces friction during assembly. This makes installation easier.
Cooling the bit before storing it prevents damage. Hot bits can warp or lose sharpness. Allowing them to cool naturally increases tool life.
Removing sharp edges prevents injuries. Metal edges can cut skin or fabric. Smoothing them reduces risk.
Preparing the hole for the final drilling ensures a clean result. A good pilot hole leads to a perfect final hole. This step completes the drilling process successfully.
Conclusion
Drilling a pilot hole in metal makes the entire drilling process smoother, safer and far more accurate. A good pilot hole keeps the drill bit steady and prevents it from slipping across the metal surface. This helps increase accuracy and protects both the metal and the tool.
Choosing the right drill bit, using cutting oil and working at a controlled speed all contribute to better results. Simple steps like using a center punch and clamping the metal improve safety and control. These practices help beginners achieve professional results.
A well prepared pilot hole becomes a guide for the larger drill bit. It reduces heat, improves cutting performance and creates smooth edges. With practice, anyone can drill clean and accurate holes in metal with confidence.
If you want the final hole to be clean, safe and perfectly aligned, the pilot hole should always be your first step. This small preparation leads to a better finish and a more successful project. Drilling metal becomes easier once you follow the proper steps.

I’m John F. Nicholas, the founder, lead writer, and drill enthusiast behind 101drill.com. With years of hands-on experience in power tools and DIY projects, I created this platform to share practical knowledge, expert tips, and real-world insights to help others master the art of drilling.