
You pick up a power drill and a clean piece of wood, ready to make a simple one-inch hole — yet as soon as you start drilling, smoke rises, the bit jams, or the edges splinter.
Creating a large, clean hole in wood isn’t as easy as it looks. The wrong speed, pressure, or bit can ruin your material instantly.
Drilling a 1-inch hole requires the right combination of tools and technique. You’re removing a significant amount of material, so control and precision matter more than power alone. Understanding how wood fibers behave helps prevent tear-out and keeps the hole smooth.
Whether you’re running wiring, installing dowels, or crafting furniture, drilling a one-inch hole is a fundamental skill every woodworker needs. With a few smart steps and the correct bit, you can cut through any wood type quickly and neatly.
In this complete guide, you’ll learn how to drill a perfect 1-inch hole in wood — including the right bits, setup, speed, and finishing tips for professional-level results.
Choosing the Right Drill Bit for a 1-Inch Hole

The first step toward perfection is choosing the right bit. A 1-inch hole is relatively large, so you need a bit designed for stability and smooth cutting.
Spade bits are the most common choice for drilling large holes. They’re flat with two sharp cutting edges and a center point that guides the hole. While fast and affordable, they can leave rough edges if used carelessly.
Forstner bits produce the cleanest, smoothest holes. They cut with precision and maintain flat bottoms, perfect for furniture or cabinetry work. Because they require more torque, they’re best used with drill presses or powerful cordless drills.
Hole saws are ideal for cutting through thicker boards. They remove a circular plug of wood rather than grinding the entire interior, which reduces strain and heat. For deep holes, use hole saws with pilot bits for better guidance.
Auger bits are great for deep drilling. Their spiral shape clears chips efficiently and maintains a consistent hole diameter. These bits are common for carpentry and timber framing.
Finally, paddle bits and self-feed bits serve well for rough carpentry, where speed matters more than finish. However, they require firm control and a stable grip.
Each bit type has unique advantages, so select one based on your wood type, project depth, and desired finish quality.
Setting Up the Work Area Properly
Before you start drilling, preparation ensures accuracy and safety. Begin by securing the wood firmly to your workbench using clamps. Movement during drilling is one of the main causes of rough, uneven holes.
Mark the exact center of your hole using a pencil or center punch. A small indentation helps the bit’s tip stay aligned during the initial contact with the wood surface.
Place a scrap backing board beneath your workpiece. This prevents blowout or splintering when the bit exits the other side.
Make sure your drill battery is fully charged, or your corded drill is connected to a steady power source. Drilling large holes consumes more energy than smaller ones.
Select the correct speed setting. For hardwoods, use a slower speed around 500–800 RPM; for softwoods, you can go slightly faster. The goal is to remove wood steadily without burning.
Lastly, wear safety glasses and clear the area of loose objects. Wood chips can fly when drilling large holes, so staying protected and organized ensures a smooth experience.
What size drill should I use for a 1-inch hole saw?
A standard 3/8-inch or 1/2-inch drill works fine, but make sure it supports slow-speed torque.
Do I need a drill press for large holes?
No, but it improves accuracy and reduces hand fatigue. Hand drills work if properly stabilized.
How do I mark a perfect center point?
Use a center punch or an awl to create a small divot that guides the bit’s tip.
Should I clamp small pieces?
Always. Even small boards can spin violently if not clamped securely.
Can I drill a large hole freehand?
Yes, but using a steady grip and low speed is essential for control and precision.
Step-by-Step Process for Drilling a 1-Inch Hole
Start by aligning the bit tip with your marked point. Hold the drill perpendicular to the wood surface to ensure a straight entry.
Begin drilling slowly to let the tip bite into the surface. Once the bit centers itself, gradually increase speed and apply light pressure. The bit should cut smoothly — not forcefully.
Drill about halfway through the wood, then stop. Flip the piece and finish from the other side using the same alignment mark. This technique avoids splintering when the bit exits.
Clear chips frequently by pulling the bit slightly out while it spins. This prevents clogging and overheating inside the hole.
If using a hole saw, apply gentle, consistent pressure. Let the teeth cut naturally rather than pushing hard. Forstner bits require steady feed pressure but yield the cleanest results.
Once the bit passes through, release the trigger before removing it completely. This avoids tearing the hole edges.
Clean out the wood plug or debris with a brush or vacuum, then inspect the edges for smoothness.
Drilling Clean Holes Without Tear-Out
Tear-out happens when wood fibers break off around the hole, leaving jagged edges. To prevent this, start slowly and use a sharp, high-quality bit.
Always use a backing board beneath your workpiece. It supports the fibers as the bit exits, producing a clean edge on the backside.
Drill at a consistent speed — too fast causes burning, while too slow creates choppy cuts. Medium speed with steady pressure yields the best control.
For extremely clean finishes, apply masking tape over the drilling area. The tape holds fibers in place and peels away cleanly after drilling.
If you’re using a hole saw, make sure its pilot bit is sharp and centered. A dull pilot causes wandering and uneven entry.
Forstner bits are the best choice when perfection matters. Their circular cutting edge shears the wood instead of tearing it, resulting in smooth walls.
After drilling, light sanding with fine-grit paper removes any minor roughness around the edges.
Why does my wood splinter?
It’s usually due to high speed or lack of support underneath. Always drill with a backing board.
Can I drill without masking tape?
Yes, but tape helps prevent surface chipping, especially on plywood or veneered wood.
Why does my bit overheat?
You’re drilling too fast or not clearing chips often enough. Pause to let the bit cool.
Should I drill halfway and flip?
Yes, drilling from both sides gives the cleanest results and prevents exit tear-out.
Can I use oil while drilling wood?
No, oil can stain wood. Simply clear dust frequently to reduce friction.
Using Different Drill Types for 1-Inch Holes
The type of drill affects how easily you can make a clean 1-inch hole. A corded drill offers consistent power and is ideal for dense hardwoods.
A cordless drill provides mobility and convenience for outdoor work but may need a high-capacity battery for large bits.
For professional precision, a drill press is unmatched. It holds the bit steady and ensures perfect vertical alignment for repeated holes.
If you use a right-angle drill, it’s helpful in tight spaces where a regular drill doesn’t fit. These tools still deliver enough torque for 1-inch holes.
Rotary tools and impact drivers are not recommended for large holes in wood — they lack stability and can damage both the bit and surface.
For clean, deep holes, consider using a speed-reduction attachment or torque control setting on your drill. This keeps performance consistent under heavy load.
Always match the tool’s RPM range to your bit size. Larger bits work best at lower speeds to avoid vibration and splintering.
Finishing the Hole Smoothly
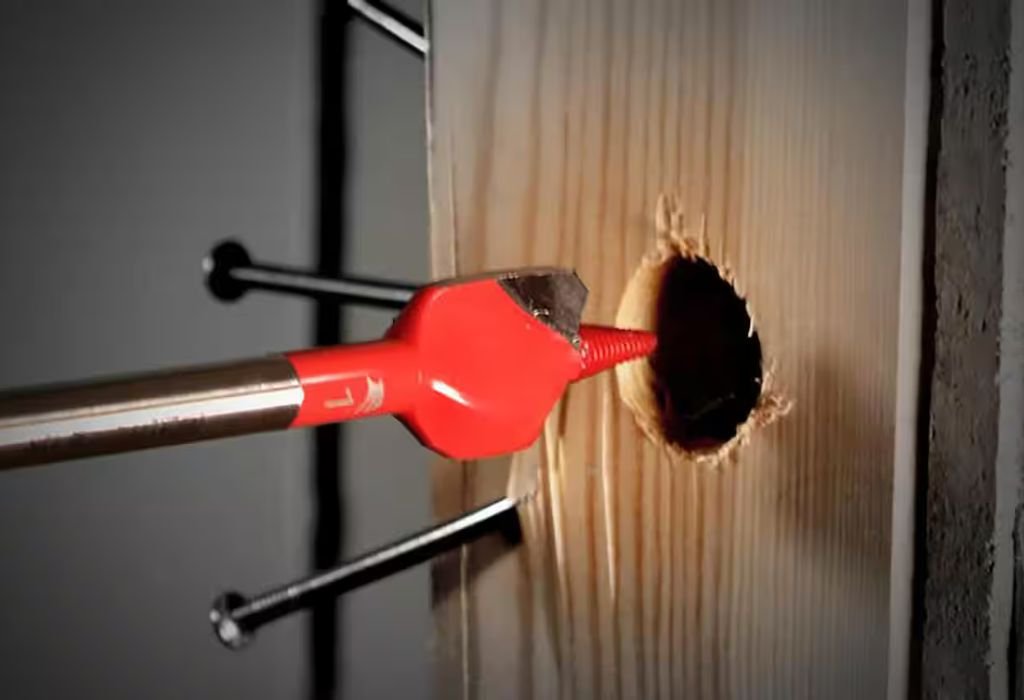
Once your hole is drilled, cleaning and finishing make a big difference. Remove all dust and wood chips using compressed air or a soft brush.
Inspect the edges for burrs or rough spots. Smooth them with fine-grit sandpaper wrapped around a dowel or cylindrical object.
If the hole will hold dowels or screws, check that the fit is snug but not too tight. Slight sanding may help achieve perfect alignment.
For decorative work, apply wood filler around the rim to repair tiny chips. Sand it flush once dry for a flawless surface.
Apply wood sealer or clear coat to protect the exposed fibers from moisture and wear. This is especially important for outdoor or furniture applications.
If you plan to stain the wood, test the color first on a scrap piece. Wood inside drilled holes absorbs stain faster, so wipe off excess quickly.
When finished, your 1-inch hole should look professional, smooth, and ready for any application.
How do I make the hole edges perfectly smooth?
Light sanding and applying a bit of sealer or finish can smooth and strengthen the edge.
Can I enlarge the hole later?
Yes, use a slightly larger bit or sanding drum to widen it carefully.
Why is the hole uneven?
The drill angle might have shifted; ensure you hold the drill perpendicular to the wood.
Can I fill an oversized hole?
Use wood filler or a plug, then redrill to the correct size once hardened.
Should I varnish inside the hole?
Yes, for durability — apply a thin coat and let it dry fully before inserting hardware.
Common Mistakes to Avoid
Drilling too fast is the most common mistake. It generates heat, burns the surface, and dulls the bit quickly.
Failing to clamp the wood leads to vibration and uneven holes. Always secure your material before starting.
Skipping pilot holes can cause bit wandering, especially on hard surfaces. A small starter hole improves accuracy.
Ignoring bit maintenance shortens lifespan. Clean sap or resin from the bit after use to maintain sharpness.
Over-drilling damages the backing board and causes blowout. Stop drilling as soon as the tip begins to exit.
Pushing too hard strains your drill motor and tears wood fibers. Let the bit do the work — gentle, steady pressure is enough.
Finally, forgetting safety gear like goggles or dust masks can lead to injury. Always stay protected when working with power tools.
Conclusion
Drilling a 1-inch hole in wood doesn’t have to be difficult. With the right bit, steady hands, and careful setup, you can achieve clean, precise holes every time.
Start slow, secure your material, and control your speed. Using high-quality bits like Forstner or hole saws ensures smooth edges and professional results.
Avoid common mistakes like drilling too fast or skipping a backing board, and your holes will stay sharp and splinter-free.
Whether you’re making furniture, fitting dowels, or crafting decorations, mastering this skill gives your projects a polished, durable finish. The next time you pick up a drill, you’ll know exactly how to make that perfect 1-inch hole.

I’m John F. Nicholas, the founder, lead writer, and drill enthusiast behind 101drill.com. With years of hands-on experience in power tools and DIY projects, I created this platform to share practical knowledge, expert tips, and real-world insights to help others master the art of drilling.