
You line up your drill perfectly, squeeze the trigger, and the bit glides smoothly through the wood. It’s flawless — until the next project requires something different: an angled hole. Whether it’s for a dowel joint, a screw through furniture legs, or a hidden connection, suddenly straight drilling isn’t enough.
Drilling at an angle sounds easy until you try it. The bit slips, the angle feels off, and the result is either too shallow or too deep. A small misalignment can ruin the entire joint, leaving gaps or weak connections.
Professional woodworkers know that angled holes create both strength and style. They help hide fasteners, reinforce corners, and connect pieces where straight holes can’t reach. But precision is everything, and the right technique makes all the difference.
In this comprehensive guide, you’ll learn how to drill perfect angled holes in wood — with or without a jig. From simple hand-tool tricks to advanced angle guides, we’ll cover every step for clean, accurate results that look like expert craftsmanship.
Why Angled Holes Are So Useful in Woodworking
Angled holes solve a problem that ordinary straight drilling can’t: connecting two surfaces that meet at different planes. They allow screws or dowels to join boards without visible fasteners or bulky brackets.
Furniture makers rely on angled drilling for chair legs, table supports, and cabinetry where aesthetics matter as much as strength. Even simple household repairs benefit from angled holes when access is limited.
For instance, pocket holes — a common form of angled drilling — let you screw boards together cleanly from the inside, hiding the screws from view. This technique alone revolutionized modern furniture assembly.
Angled drilling also improves structural integrity. A screw driven diagonally grips more surface area than a straight one, increasing tension and stability.
Understanding where and why to use angled holes helps you choose the right approach, ensuring every joint you make is both strong and seamless.
Understanding Angles and Alignment
Before you start drilling, you must understand what the angle represents. A 45-degree hole, for example, means the bit enters the wood halfway between vertical and horizontal. Precise control over that degree is the key to accuracy.
Use a protractor, bevel gauge, or digital angle finder to mark your desired angle. Even a small mistake of five degrees can misalign the joint, so measure carefully.
When drilling by hand, consistency is harder to maintain. The drill naturally wants to return to vertical, especially under pressure. Stabilizing your arms and working slowly keeps the angle steady.
Visualize the line of entry before you begin. Drawing a pencil line at the correct angle on both the surface and side of the wood helps guide your eye as you drill.
Preparation may take time, but it’s what separates a rough hole from a perfect one that fits precisely where you intended.
Choosing the Right Drill and Bit
For angled holes, control matters more than raw power. A cordless drill with variable speed and ergonomic grip gives better balance. Avoid heavy hammer drills — they’re difficult to manage at tilted angles.
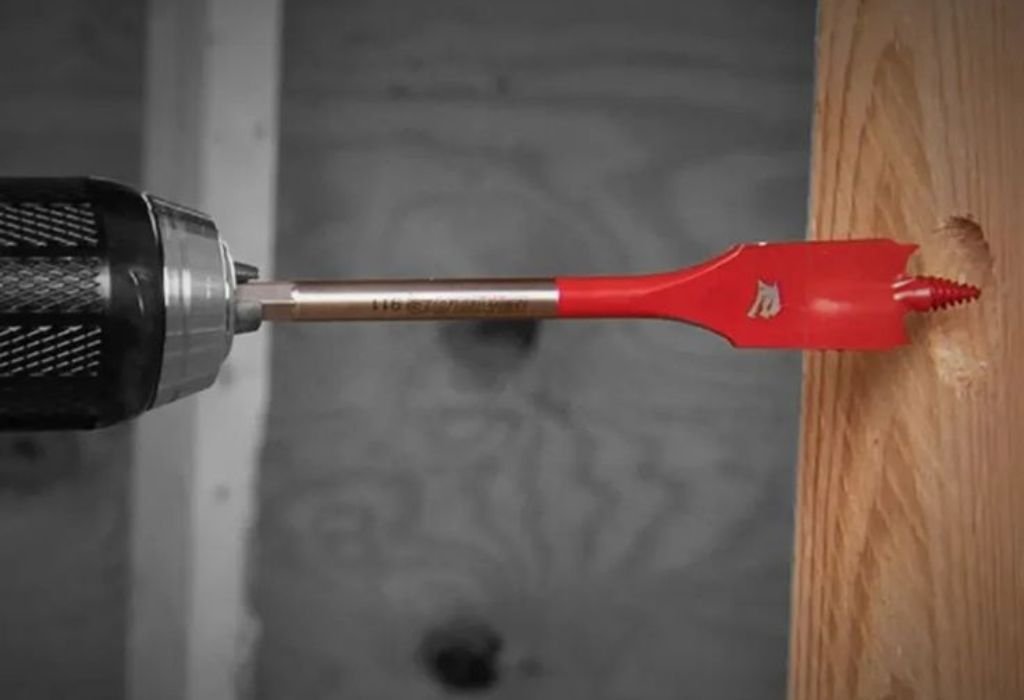
Use a sharp wood bit such as a brad-point or twist bit for small holes, or a Forstner bit for wider ones. The brad point’s center spur prevents wandering when entering at an angle.
Long bits can flex slightly, making it harder to keep your line straight. Shorter bits offer better stability. If you must drill deeply, start shallow and then extend gradually using a longer bit.
Always check that your bit is aligned properly in the chuck. Even a slight wobble can exaggerate as you drill diagonally. A balanced setup gives smoother entry and reduces chatter.
Selecting the right tool combination ensures control, accuracy, and cleaner holes with fewer mistakes.
Marking the Hole Position and Angle
Precise marking defines the success of angled drilling. Begin by marking the hole’s starting point clearly using a pencil or awl. Then draw a short guide line on the surface showing the intended direction of the bit.
If possible, extend that same line onto the adjacent face of the board. This gives you two visual guides to help maintain your angle as you drill.
Use a bevel gauge to mark your angle accurately. Set it to 15, 30, 45 degrees, or whatever your project requires, and trace it onto the surface.
If you’re joining two boards, mark both pieces at once so that the holes align perfectly when assembled. Mismatched angles often cause visible gaps that weaken joints.
Double-check measurements before drilling. Once you begin cutting, correcting the angle becomes much more difficult.
How to Drill an Angled Hole by Hand
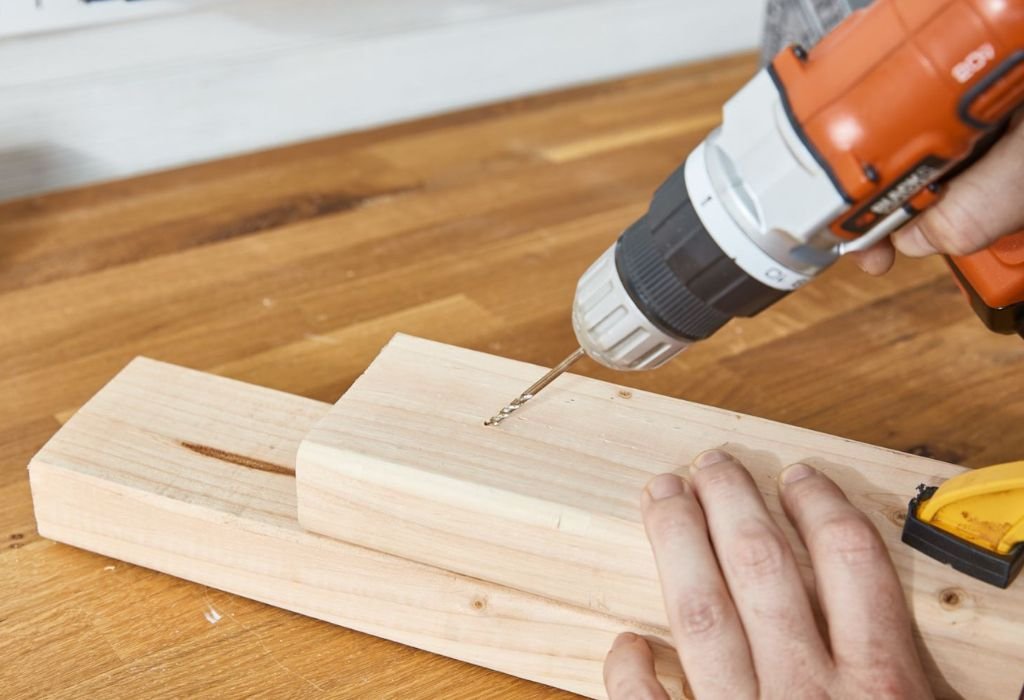
Drilling an angled hole by hand is possible with patience and proper body positioning. Start by aligning the bit with your drawn guideline. Keep both hands steady, one gripping the drill and the other guiding near the front for stability.
Begin drilling at low speed. Let the bit bite gently into the surface at your chosen angle. The first few millimeters are the most critical — once the bit is seated, the path becomes easier to maintain.
Apply even pressure without forcing the drill. Too much pressure causes wandering or kickback, especially on hard wood.
If the bit starts to veer off course, stop immediately. Withdraw slightly, realign, and re-enter at the correct angle. Small corrections early prevent major misalignment later.
For deep holes, pause periodically to clear wood chips and check alignment. Patience ensures smooth, precise drilling every time.
Using an Angle Guide or Drilling Jig
One of the best ways to ensure consistent accuracy is using an angle guide or jig. These simple devices hold your drill at a fixed tilt, eliminating guesswork.
Commercial guides allow adjustment between 15 and 90 degrees. Clamp the guide onto your workpiece, set the desired angle, and let the guide’s sleeve direct your drill.
If you don’t own one, make a quick DIY jig by cutting a wooden block at your required angle. Rest your drill against this block as you bore the hole. The block acts like a physical guide that keeps your motion steady.
Always clamp both the jig and the workpiece firmly. Stability is key — movement can instantly change the hole’s direction.
Angle guides are invaluable for repeatable results, especially when drilling multiple holes at identical degrees.
Drilling Angled Pocket Holes
Pocket holes are among the most popular angled drilling techniques in woodworking. They allow hidden screw connections that are both strong and neat.
To make pocket holes, use a pocket-hole jig like a Kreg system. The jig positions the drill bit at about 15 degrees and includes a stop collar to control depth.
Secure your workpiece tightly in the jig, insert the special stepped drill bit, and bore the hole until the collar touches the guide. The bit automatically creates a pocket with a pilot channel for the screw.
This system works well for furniture assembly, cabinetry, and framing where visible screws would ruin the appearance.
Pocket-hole jigs guarantee consistent, professional-grade joints even for beginners, removing nearly all risk of misaligned angles.
How to Drill Angled Holes with a Drill Press
For perfect repeatability, a drill press with an adjustable table tilt is unbeatable. This machine ensures the drill bit stays at a precise, constant angle throughout the process.
Start by setting the table tilt to your desired angle using the built-in scale. Clamp the wood securely to prevent movement during drilling.
Lower the bit slowly until it just touches the surface to confirm alignment, then begin drilling at medium speed. The drill press keeps everything rigid and eliminates wobble.
If your machine doesn’t tilt, you can instead place a wedge block beneath the wood to simulate the same effect. This trick works remarkably well for small-shop setups.
Always wear safety glasses and keep fingers away from moving parts. A steady press produces clean holes with sharp, even walls.
Using a Pilot Hole to Prevent Splitting
Drilling at an angle increases stress on wood fibers, which can cause cracks or splits if done too aggressively. Creating a pilot hole helps relieve that tension.
Start by drilling a small, shallow hole — roughly half the size of your main bit — following your marked angle. This pilot hole acts as a guide and reduces resistance when the larger bit follows.
It also prevents screw heads from forcing the wood apart once installed. This technique is especially important when drilling near edges or in hardwoods like oak or maple.
Pilot holes also make it easier to keep the final drill aligned. The bit naturally follows the pilot channel, minimizing wandering and friction.
This small preparatory step greatly improves accuracy and preserves the integrity of your project.
Common Mistakes to Avoid When Drilling Angled Holes
The most frequent error is starting too fast. High drill speed on initial contact makes the bit skid, scratching the surface and ruining alignment. Always start slow and steady.
Another mistake is holding the drill loosely. Angled drilling requires firm control to counteract sideways torque. Keep your arms steady and your grip even.
Not clamping the wood properly causes vibration, which leads to crooked holes or surface damage. Always secure your workpiece before drilling.
Failing to clear chips is another problem. Sawdust builds up inside the channel and pushes the bit off-course. Withdraw occasionally to release debris.
Finally, don’t eyeball your angle. Without a marked guide, even experienced carpenters misjudge degrees easily. Measure twice, drill once, and the results will always be cleaner.
Finishing and Cleaning the Angled Hole
Once your angled hole is complete, focus on finishing touches for a professional look. Remove any wood chips and inspect the interior for smoothness.
Use fine-grit sandpaper (180–220) wrapped around a small dowel to polish the inside gently. This removes burrs and prevents screw threads from catching.
If the hole will remain visible, consider sealing the interior with clear finish or wood wax. This protects against moisture and prevents darkening over time.
For structural joints, test-fit the screw or dowel immediately. The fit should feel snug without forcing. If it’s too tight, widen slightly using controlled sanding.
Clean, smooth holes not only look better but also perform better by ensuring precise fit and long-term strength.
FAQ: Pro Tips for Perfect Angled Drilling
Can I drill angled holes without a jig?
Yes. You can mark guide lines and maintain the angle manually with slow, steady drilling, though a jig improves accuracy.
What angle is best for pocket holes?
Most pocket-hole systems use about 15 degrees, offering strong joints with hidden screws.
How do I keep my drill from slipping at an angle?
Start at low speed and let the bit score a small dimple before increasing pressure or speed.
Can I drill angled holes in hardwood?
Absolutely, but always use sharp bits, pilot holes, and lower speed to prevent burning or cracking.
What if I need multiple identical angles?
Use a drill press or adjustable jig to repeat the same degree consistently for every piece.
Why does my hole wander off line?
Too much pressure or uneven grip can push the bit sideways. Let the tool cut naturally at its own pace.
Conclusion
Drilling holes at an angle transforms ordinary woodworking into refined craftsmanship. It’s the foundation of strong joints, hidden fasteners, and sleek, modern designs.
Mastering the technique takes patience. Each project teaches balance — between speed and control, between power and finesse. With practice, angled drilling becomes second nature.
Whether you use a simple block guide, a pocket-hole jig, or a drill press, every method depends on one thing: precision. Mark carefully, hold steady, and drill slowly.
When your holes line up perfectly and every connection fits tight and clean, you’ll know the effort was worth it. Because in woodworking, precision isn’t just skill — it’s art.

I’m John F. Nicholas, the founder, lead writer, and drill enthusiast behind 101drill.com. With years of hands-on experience in power tools and DIY projects, I created this platform to share practical knowledge, expert tips, and real-world insights to help others master the art of drilling.