
Brick is a hard, brittle material made from fired clay with varying density and hardness. It does not cut like metal or wood because it fractures into powder under repeated impacts.
Inside each brick are grains and voids that resist a sharp steel edge. Instead of forming chips, the surface micro cracks and crumbles when stressed correctly.
A regular twist bit tries to slice with a thin lip that prefers ductile materials. When that lip meets abrasive grains, it quickly becomes polished and loses bite.
Once the lip is rounded, the drill converts torque into heat without progress. You hear squealing, feel more friction, and see burn marks around the hole.
The right way to move through brick is to crush and abrade the matrix. That is exactly what a masonry bit with a hard insert is built to do.
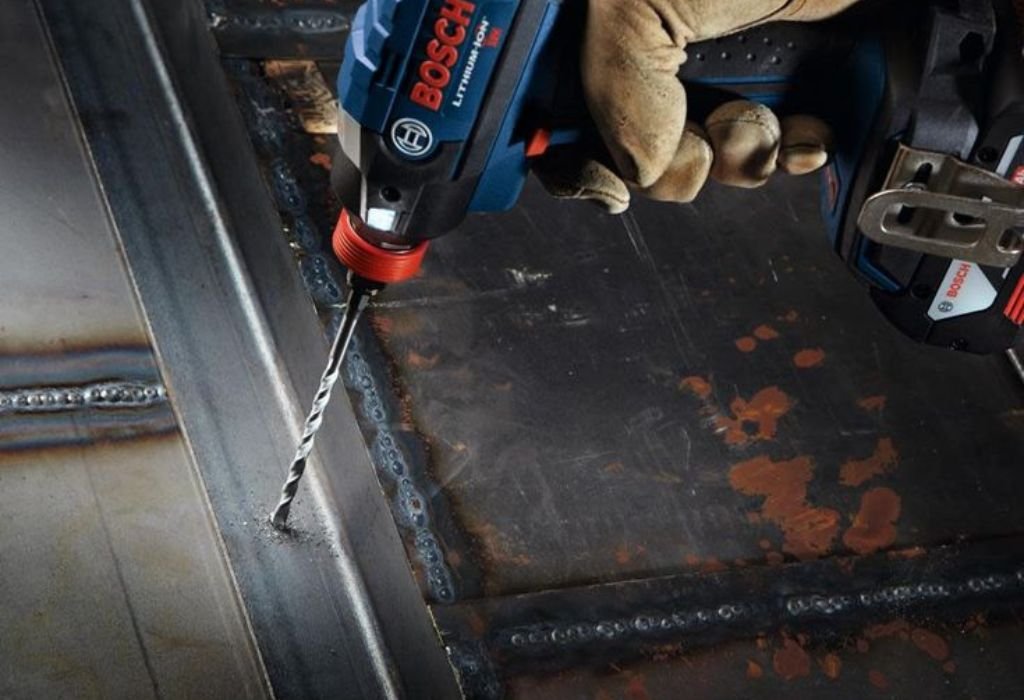
A masonry bit has a robust tip that shatters the surface with each blow. Its flutes are shaped to carry the fine dust out so the tip keeps working.
Heat still builds if dust stays trapped inside the hole. Clearing the bore often keeps the temperature down and protects the cutting edge.
Understanding this behavior explains why bit choice matters. The physics of fracture reward a tough, blunt insert over a thin, sharp lip.
When You Truly Need a Masonry Bit for Brick
You need a masonry bit whenever you plan to set anchors in solid brick. Anchors depend on accurate diameter, true alignment, and sound hole walls.
You need one when drilling through the hard face of modern engineering brick. The dense surface defeats steel edges and punishes drills with heat.
You need one for repetitive holes such as ledger boards, shelves, and mounts. Consistency across many holes requires a cutting method that does not fade.
You need one for larger diameters that move more material per millimeter. A stronger tip and percussion transfer keep the hole round and predictable.
You need one when drilling near corners where chipping is a risk. A stable masonry tip reduces breakout and preserves the edge profile.
You need one whenever you hit mixed materials in one pass. A hard insert survives transitions that glaze ordinary bits in seconds.
You need one when you are working on older bricks with variable hardness. A purpose built tip rides out the changes without stalling the job.
You need one if you value the life of your metal drilling set. Saving cobalt or HSS for metal work prevents costly replacements later.
Situations Where a Regular Bit Seems to Work, and Why It Fails
A sharp steel bit may scratch a shallow divot in very soft mortar. That small success tempts people to push deeper into the brick itself.
The moment the lip meets harder grains the progress collapses. The tip polishes smooth, the bore scorches, and the motor labors for little gain.
A regular bit can appear to work if the brick is unusually soft. Even then the hole becomes ragged, tapered, and unreliable for proper anchors.
The same bit that makes one shallow hole may fail on the next. Brick density shifts by batch, by face, and even within a single unit.
You might force a hole with high pressure, but the risk rises sharply. Excess force chips the face, widens the entry, and weakens the final grip.
The time cost grows as batteries drain and edges burn. One correct masonry bit would finish the job faster and with fewer mistakes.
Can I drill brick without a masonry bit if it is an emergency?
It is possible to make a tiny pilot in softer mortar, but results are inconsistent. The hole quality is poor, and the risk of chipping grows as the tip overheats.
Why does my steel bit turn shiny and stop cutting in brick?
Abrasive grains scrub the cutting lip until it becomes round. A rounded lip cannot bite the surface, so heat rises and progress nearly stops.
Will a small pilot hole make steel bits succeed in brick?
A pilot does not change how brick fractures under load. You still need an abrasion resistant tip and percussion to move through the hard face.
Choosing the Right Tool and Bit for Brick
A standard drill driver can spin a masonry bit, but it is slower. Without percussion the tip must grind continuously, which raises heat and time.
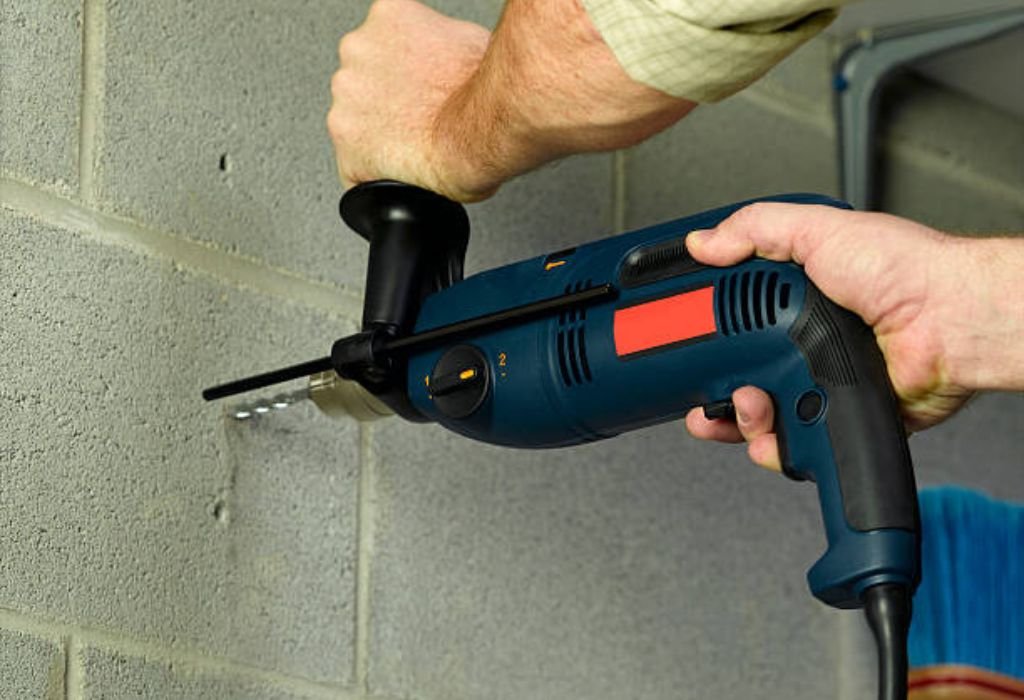
A hammer drill adds rapid impacts that break the surface efficiently. The bit advances with less pressure and keeps its edges effective longer.
For frequent holes or larger diameters an SDS or SDS Plus system shines. The shank locks in so impact energy moves directly into the carbide tip.
Premium carbide inserts matter when brick is dense or old. Harder formulations resist micro chipping and hold diameter across many holes.
Match bit size to the anchor chart from the hardware maker. Correct diameter and depth protect holding strength and prevent spin or pullout.
Use depth stops or tape marks on the shank to control penetration. Consistent depth makes anchors seat flush and keeps fixtures aligned.
Vacuum extraction at the hole improves speed and cleanliness. Clear flutes carry dust out so the tip stays cool and the bore stays straight.
Invest once in a small set that covers common anchor sizes. A reliable kit pays for itself the first time you avoid a botched install.
Step by Step for Clean Holes in Brick
Mark the hole with painters tape and a center mark on the face. The tape reduces initial skating and helps contain minor chipping.
Start with a short masonry bit that is less prone to wander. Hold the drill square to the wall and let the tool find a steady rhythm.
Use the hammer setting if your drill offers percussion. Apply firm, even pressure without leaning hard on the handle.
Pulse the trigger to manage heat when drilling without hammer. Short bursts give the tip time to clear dust and regain bite.
Withdraw the bit every one or two centimeters to vacuum the bore. Clean flutes prevent packing that converts energy into heat.
Step up one size only if the anchor specification requires it. Each step should be brief because the pilot has already defined the path.
Test fit the anchor in a clean, cool hole before you proceed. If it feels loose, check diameter and remove dust with a final vacuum.
Seat the anchor to the specified depth and torque gently. Over tightening can crush the brick face and reduce long term strength.
Can I use water to cool the bit while drilling brick?
Light misting helps control dust and heat, but avoid soaking the hole. Excess water makes slurry that packs the flutes and slows progress.
What if I hit something solid and progress stops suddenly?
You may have reached a hard inclusion or a void edge. Withdraw the bit, clear dust, and resume with steady alignment and light pressure.
How do I prevent breakout on the far side of a through hole?
Reduce pressure as you approach the exit and support the back face if possible. A scrap board or tape on the rear surface reduces chipping.
Safety, Dust, and Anchor Reliability
Silica dust is hazardous to lungs and eyes during drilling. Wear eye protection and a tight fitting respirator whenever you work in brick.
Hearing protection matters because percussion creates sharp impulses. Protecting your ears preserves comfort and focus during longer sessions.
Gloves improve grip on a vibrating tool in awkward positions. Choose snug styles that avoid contact with the rotating chuck.
Manage cords, hoses, and ladders to maintain a safe stance. A stable body position keeps the bit square and reduces side load on the tip.
Vacuum the hole before inserting any anchor or screw. Dust acts like a lubricant and prevents proper friction against the wall.
Verify the anchor type fits the substrate you have. Solid brick favors expansion anchors, while hollow sections prefer sleeve or chemical options.
Follow the torque guidance from the anchor manufacturer carefully. Over driving can fracture the face and undermine the holding force.
Document sizes and depths used on each project for repeatability. A quick record saves time when you add fixtures near the same area later.
Troubleshooting Common Brick Drilling Problems
If the hole wanders at the start, reset with a smaller pilot. A shallow dimple made square helps the larger bit track correctly.
If the bit binds, stop and clear the bore completely. Packed dust increases friction and overheats both the tip and the motor.
If the entry chips, widen the tape pad and soften the touch. A slower feed near the face reduces breakout and keeps edges clean.
If you strike a very hard inclusion, do not force the cut. Shift a few millimeters if structure allows, or step up to a premium tip.
If anchors spin, the diameter may be oversize or dusty. Clean the hole and consider a slightly larger anchor or a chemical set.
If the tool overheats, reduce speed and increase percussion. Heat is a sign of rubbing rather than effective micro fracture.
If your bit looks glazed, retire it before it damages more work. A fresh tip will cut cooler, straighter, and with far less effort.
If progress remains slow, move to an SDS system for efficiency. Higher impact energy often solves stubborn brick without extra force.
Do I need a masonry bit for every single brick project?
You do whenever you want clean, accurate holes that hold anchors well. The bit is designed for brick and pays off in speed, quality, and safety.
Can I reuse a worn masonry bit until it finally stops?
Worn tips drift, overheat, and oversize holes. Replacing them early protects anchors and prevents breakout that spoils visible faces.
Will a regular steel bit damage my drill motor over time?
Excess friction forces the motor to work harder and run hot. A proper masonry bit with percussion reduces load and extends tool life.
Conclusion
You do need a masonry drill bit for brick if you value clean holes and strong anchors. Brick rewards impact and abrasion rather than thin cutting lips.
A hammer drill with a carbide masonry tip finishes holes quickly and safely. The right pairing keeps edges cool, bores straight, and fixtures secure.
Regular steel bits may scratch soft mortar, but they fail in real brick. That path wastes time, burns edges, and risks chipping the face you want to keep.
Plan your hole sizes from the anchor chart before you start. Carry a small set of masonry bits and a reliable vacuum to manage dust.
Work square, pause to clear the bore, and control your feed. Small habits compound into faster progress and longer tool life.
Choose purpose built bits for brick and keep metal bits for metal. Your projects will run smoother, look cleaner, and last for years.

I’m John F. Nicholas, the founder, lead writer, and drill enthusiast behind 101drill.com. With years of hands-on experience in power tools and DIY projects, I created this platform to share practical knowledge, expert tips, and real-world insights to help others master the art of drilling.