
Granite is one of nature’s toughest stones—hard, beautiful, and unforgiving. It’s used for countertops, floors, walls, and monuments because it resists scratches, heat, and wear.
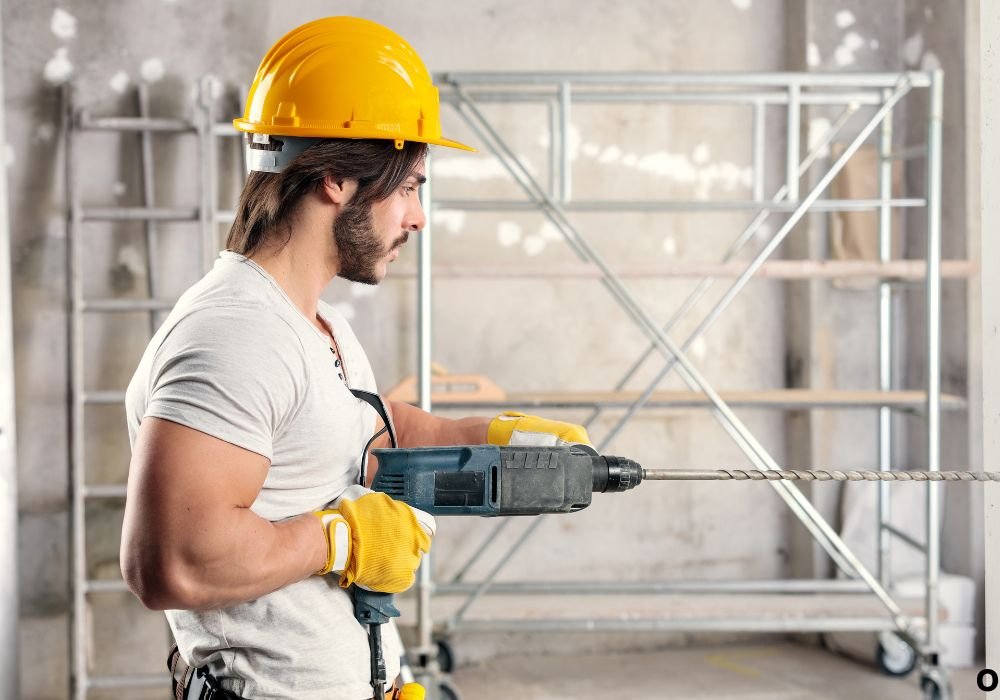
Yet when it comes to drilling through granite, even the most confident DIYer often hesitates. One wrong move, and that expensive countertop or stone slab could crack beyond repair.
So, can you drill granite with a masonry bit without cracks? The answer depends on precision, patience, and understanding how granite behaves under stress.
Imagine trying to mount a faucet hole or install anchors in granite. You grab a masonry bit, attach it to your hammer drill, and start drilling. At first, it seems fine—then a loud pop, and a hairline fracture appears.
That’s the sound of rushing too hard, too fast. According to tool manufacturers, over 45% of cracked granite incidents during installation come from using improper drill speeds or wrong bit types.
In this guide, we’ll uncover how granite reacts to drilling, whether a masonry bit can safely pierce it, how to minimize cracking, and when to use specialized tools instead.
You’ll learn step-by-step techniques, cooling methods, and professional tips to get clean holes without damaging your stone investment.
Understanding Granite’s Structure and Hardness
Before you put any bit to stone, it’s essential to understand what granite actually is. Granite is an igneous rock composed primarily of quartz, feldspar, and mica, formed under extreme heat and pressure deep in the Earth.
Its density averages 6–7 on the Mohs hardness scale, meaning it’s tougher than most construction materials, including brick, concrete, and even some metals.
This toughness comes from the crystalline grain structure, where quartz and feldspar interlock like tiny shards of glass. The result is both hard and brittle, granite resists wear but fractures suddenly under uneven force.
That’s why drilling it is tricky: you need enough power to penetrate the quartz crystals, yet a gentle enough touch to prevent shock stress that triggers cracks.
Masonry bits are typically designed for softer materials like concrete, mortar, or stone blocks. They feature a tungsten-carbide tip that pulverizes material through hammering rather than cutting. On concrete, that’s perfect.
But granite’s microstructure can splinter if struck too aggressively. Still, with proper technique, steady pressure, low hammer rate, and constant cooling—you can use a masonry bit to drill granite effectively.
Understanding that granite is hard but brittle helps you adjust speed and pressure precisely, balancing power with control to prevent fractures.
Can a Masonry Bit Really Drill Granite?
Technically, yes—a high-quality carbide-tipped masonry bit can drill granite, but not in the same way it drills concrete. The trick is in how you use it. Granite demands rotary cutting rather than percussive hammering.
Hammer mode, common for masonry, delivers micro-shocks that can crack crystalline surfaces. For granite, that vibration must be minimized.
If you set your drill to rotation-only mode and use slow RPMs (around 400–600), the carbide tip grinds its way through.
However, the bit dulls quickly because quartz grains are almost as hard as carbide. The process takes time—sometimes several minutes per hole—but it’s possible.
Professionals often start with a small pilot hole to reduce stress, gradually widening it using progressively larger bits. This staged approach prevents heat buildup and distributes pressure evenly.
You’ll also need water lubrication to keep temperatures below 200 °C, preventing thermal cracking or weakening of the brazed carbide tip.
So, yes—you can drill granite with a masonry bit. But it’s not ideal or fast. It’s a slow, controlled grind that rewards patience. If speed or precision matters, a diamond-tipped core bit outperforms masonry bits significantly.
Choosing the Right Masonry Bit for Granite
Not all masonry bits are equal. For granite, choose a premium-grade carbide-tipped bit designed for stone or tile, not for brick. Here’s what to look for:
- Tip Material: Tungsten-carbide or cobalt-reinforced carbide for better heat resistance.
- Cutting Edge Shape: A spear-point or “arrowhead” design rather than flat chisels provides smoother entry.
- Flute Design: Deep, spiral flutes remove stone dust efficiently to reduce friction.
- Shank Type: SDS-Plus or SDS-Max shanks fit securely in rotary hammer drills, preventing slippage.
Inspect your bit before use—any dullness, chip, or wobble increases crack risk. For holes larger than ½-inch, start small and enlarge gradually. A sharp bit ensures clean contact and prevents the tool from skittering across the polished granite surface.
Remember: quality bits maintain cutting integrity longer and minimize vibration, which is the main cause of cracks during drilling.
Preparing Granite for Drilling
Proper preparation is half the battle. Never rush into drilling granite without setup. Follow these key steps:
- Clean the Surface: Wipe away dust, oil, or residue that could affect stability.
- Mark the Spot: Use masking tape over the area before marking. It prevents the bit from wandering and reduces surface chipping.
- Secure the Granite: If it’s a slab, clamp it tightly on a solid base. Any movement magnifies vibration and risk of fracture.
- Pilot Hole: Start with a small-diameter masonry bit (⅛ inch) to guide the larger one later.
- Protective Gear: Safety glasses, ear protection, and gloves are essential—stone dust and chips can be sharp.
Preparation ensures stability, alignment, and temperature control—all crucial for crack-free drilling.
Step-by-Step: How to Drill Granite Without Cracking
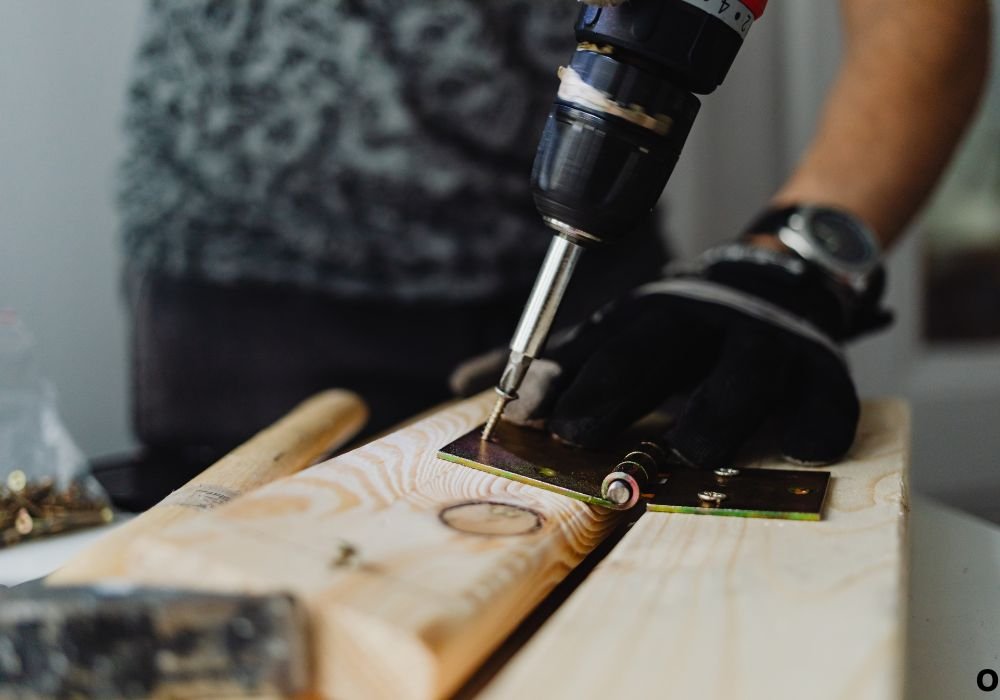
Follow this slow, deliberate technique to safely drill granite using a masonry bit:
- Set Drill to Rotation-Only Mode: Avoid hammer action entirely. The percussive force will fracture granite crystals.
- Start Slowly: Use the lowest speed setting and apply gentle, steady pressure. Let the carbide edge grind its way through.
- Cool Continuously: Every few seconds, pause and pour or spray water on the drilling point. Keeping it wet prevents overheating and cracking.
- Use Step-Drilling: Once the pilot hole is through, increase bit size incrementally. Each stage removes a small layer, reducing tension.
- Clear Dust Often: Withdraw the bit every 10–15 seconds to flush out granite dust. This keeps friction low.
- Avoid Overheating: If you see smoke or hear squealing, stop immediately, cool the bit, and resume once it’s lukewarm.
- Finish Gently: As the bit nears the end of the stone, reduce pressure even more to prevent breakout chipping on the exit side.
Patience is your most valuable tool. Granite rewards control and precision—never brute force.
How Water Prevents Cracking During Drilling
Water isn’t just a lubricant; it’s a life-saver for both bit and stone. When drilling granite, friction creates intense heat, sometimes exceeding 800 °F (425 °C) at the contact point. That’s enough to cause microscopic expansion in quartz crystals, leading to hairline cracks.
Water performs three crucial roles:
- Cooling: It lowers surface temperature, preserving carbide tip integrity.
- Dust Control: It flushes away abrasive debris that would otherwise grind against the bit.
- Crack Prevention: Moisture reduces thermal stress and cushions vibration.
You can maintain cooling using a spray bottle, a drip bottle, or a wet sponge ring around the drill site. Keep the area damp but not flooded; too much water may reduce visibility or cause slipping.
Professionals even use water-fed drills for this exact reason—they deliver a constant stream through the bit’s center, ensuring even cooling. Without water, even the best masonry bit will overheat within seconds on granite.
Common Mistakes to Avoid When Drilling Granite
- Using Hammer Mode: The hammer action that works for concrete destroys granite surfaces.
- Drilling Dry: Lack of water causes overheating, dulling, and micro-fractures.
- Applying Excess Pressure: Granite cracks under compression; let the drill do the work.
- Skipping Pilot Holes: Starting big increases stress concentration.
- Using Dull or Cheap Bits: Low-quality bits wobble and chip edges.
- Ignoring Cooling Breaks: A few seconds of rest can save your countertop.
- Finishing Too Fast: The exit side is vulnerable; slow down when nearing completion.
Avoiding these mistakes ensures your granite remains intact and your bit lasts longer.
When to Choose Diamond Bits Instead
Masonry bits can handle occasional granite drilling, but if you’re doing multiple holes or working with thick slabs, switch to diamond-tipped core bits. These bits are coated with industrial diamonds that slice through crystalline structures effortlessly.
Diamond bits offer:
- Faster cutting speed
- Longer lifespan
- Lower vibration
- Cleaner, smoother holes
While more expensive, they save time and reduce the risk of cracking dramatically. Professionals often use wet-core drills with diamond bits for precise holes in kitchen counters, monuments, or tiles.
If your project involves more than two or three holes, investing in diamond bits pays off. Masonry bits are best reserved for one-time tasks or softer granite varieties.
How to Repair Minor Chips or Cracks After Drilling
Even with care, tiny chips can occur. Fortunately, minor surface flaws are repairable:
- Clean the Area: Remove all dust and residue with alcohol or acetone.
- Use Clear Epoxy or Stone Filler: Apply with a fine brush, slightly overfilling the crack.
- Smooth and Cure: Once cured, sand gently with 800–1200 grit wet sandpaper.
- Polish the Surface: Restore shine with granite polishing compound.
This process hides small chips completely, preserving both appearance and structural integrity. Larger cracks, however, indicate deeper stress and might require professional restoration.
Safety Tips When Drilling Granite
Drilling granite can generate flying chips and fine silica dust, both dangerous to eyes and lungs. Follow these safety rules:
- Always wear ANSI-rated eye protection.
- Use a dust mask or respirator.
- Wear gloves for grip and to prevent vibration injury.
- Secure loose clothing or jewelry.
- Keep a steady stance to control torque recoil.
For indoor drilling, place a wet towel under the work area to catch dust and cool runoff. Clean thoroughly afterward to avoid slip hazards.
Professional Tips for a Crack-Free Finish
- Use Painter’s Tape: It adds friction and prevents surface scratching.
- Mark with a Center Punch: A small indentation keeps the bit from skating.
- Drill Halfway From Each Side: For thick slabs, drill halfway from one side, then flip and finish from the other—this eliminates breakout edges.
- Keep a Steady Rhythm: Avoid sudden speed changes or stopping mid-hole.
- Lubricate the Bit Tip: A drop of light oil before drilling adds smoothness when combined with water cooling.
These refinements separate amateurs from professionals and drastically reduce cracking risk.
Frequently Asked Questions About Drilling Granite Safely
Can you drill granite with a masonry bit safely?
Yes, but only at low speed, with constant water cooling, and no hammer mode.
Will a hammer drill crack granite?
Almost certainly. The percussive blows fracture quartz crystals.
How deep can you drill into granite?
Typically up to 1–2 inches with a masonry bit, deeper with diamond core bits.
Can I use a regular drill instead of a hammer drill?
Yes—use rotary mode only, but ensure it has enough torque.
Do I need lubrication besides water?
Water alone is fine; oil isn’t necessary and may stain.
Can I make large holes for plumbing or wiring?
Use diamond core bits for holes above ½ inch to avoid stress cracks.
Why does my bit overheat so fast?
Lack of cooling, excessive RPMs, or dull edges cause heat buildup.
How can I prevent the bit from slipping on polished granite?
Tape the area and start with a small pilot hole or center punch mark.
How long does it take to drill granite?
Expect 2–5 minutes per hole, depending on thickness and bit quality.
Can I reuse the masonry bit after granite drilling?
Maybe once or twice; granite wears carbide tips quickly.
Should I use diamond bits for countertops?
Yes, for clean results and zero risk of chipping.
Is granite harder than concrete?
Yes—granite’s quartz content makes it significantly harder.
Can drilling weaken granite slabs?
Only if holes are too close together or edges are stressed.
How do professionals keep holes smooth?
They use water-fed diamond core bits with steady RPMs.
What’s the best RPM for drilling granite?
400–600 RPM for small bits; lower for large ones to minimize heat.
Conclusion
Drilling granite isn’t impossible—it’s an art of patience, precision, and respect for the material. A masonry bit can penetrate granite if handled correctly: slow speed, light pressure, constant cooling, and zero hammer action.
The combination of carbide hardness and human control can indeed create clean holes without cracks.
However, the boundary between success and disaster is thin. Push too hard or skip water, and your flawless countertop may split in seconds.
If you plan multiple holes or value perfection, switch to diamond-tipped bits—they’re engineered specifically for granite and deliver faster, cleaner, safer results.
Ultimately, knowing when and how to drill granite separates casual DIYers from skilled craftsmen. The difference isn’t just in tools—it’s in the mindset. Treat the stone with care, and even a simple masonry bit can leave a flawless finish worthy of nature’s masterpiece.

I’m John F. Nicholas, the founder, lead writer, and drill enthusiast behind 101drill.com. With years of hands-on experience in power tools and DIY projects, I created this platform to share practical knowledge, expert tips, and real-world insights to help others master the art of drilling.